What are the ways?
1 - using the phpMyAdmin interface.
2 - using the hosting provider's control panel.
3 - using a third-party program.
Which is the best way?
We recommend the first one because its scheme is simple and is used by most webmasters. We do not recommend using the third method! Never trust the content of your site to third-party programs, moreover, from unknown developers. You can also use the second method, but its algorithm is very different, and depends on the hoster's control panel. Therefore, we will take a closer look at the first option, and tell you how to correctly transfer MySQL databases, without losing and damaging data.
We create a database on a new hosting
If you want to transfer a MySQL database, then you already have a database and you will be able to create it. In any case, this process is different for each of the hosting providers, but it comes down to one general algorithm:
1 - We are looking for the section "MySQL", "Databases" or something similar.
2 - In it, click "Create".
3 - We enter the name of the database, attach a user to it (usually the database user has already been created, if not, then create it and set the highest rights) and enter the password for the database.
4 - The database has been created, but it is still empty.
We export the database from the old hosting
We will now use what is called a database dump. Those. save the current database from the server to our computer. To do this, we need the phpMyAdmin interface, which we need to find in the personal account of the hosting provider that has your current site. Again, there is no single algorithm, so we give a general scheme:
2 - On the left in the corner, select your database (the one that you are going to export to your computer in order to transfer it to another hosting).

4 - You may be asked to select the export method “Normal” (many settings) or “Fast” (few settings). It doesn't matter which one you choose, the main thing is to change only those settings that we describe below.
5 - You need to select all tables by clicking on the "Select all" button.


7 - Just in case, remember the encoding, but don't touch it.
8 - Click "Ok" and save the file from the database to your computer. The file extension is usually .sql.
Importing the database to the server of the new hoster
1 - In the same way, we are looking for phpMyAdmin on the new hosting.
2 - In it we select the required database (we created it at the beginning of the article, and it remained empty).
3 - Click on the "Import" tab.
4 - Click “Browse” and select the database saved on the computer.

5 - Check that the encoding matches the one in which you saved the database.
6 - Do not change anything else, click “Ok” and your database is imported to the new hosting.
What problems are there?
1 - When importing a database, there should not be any queries like " CREATE DATABASE, / *! 40101 SET @OLD". To check their presence, open the database file on your computer with any text editor (Notepad ++ is best suited) and use Ctrl + A to look for these queries. If you find it, just delete them and try to import the database again.
2 - When importing, the database that is at the new hoster must be empty, if any tables already exist in it, select and delete them.
From the author: recently relatives came to visit. So in a couple of days they first exhausted the entire food base, then "punched out" the entire nervous one, and finally burned down the music (music center). In general, out of harm's way, I decided to quickly transfer the MySQL database. If you also find yourself in such a situation, then be sure to read this article.
Fast way to export
Let's start with an overview of phpMyAdmin. To transfer a base, you first need to create a duplicate of it. For this, the program has a special functionality. Let's consider this process in detail:
You can first select the desired base in the list on the left, and then go to the "Export" tab of the menu. If you use this option, MySQL will be migrated per table. To do this, in the "Export method" set "Normal", and in the "Tables" select the export items.

If you want to export the entire database (with all tables), then immediately go to "Export". Only here we already operate not with tables, but with bases. In the "Export method" we also set "Normal". Then select the required database, and in the "Output" section, select the "Save output to file" option.

The next step is to set the format in which the copy of the database will be saved. We select the value "SQL" in the corresponding list. This will ensure that the copy can be used on most platforms. But if you are going to transfer the database to a specific basis, then here you can choose the appropriate format: PHP array, CSV, PDF and others.

Below in the sections "Format Parameters" and "Data Saving Parameters" you can configure more "" parameters for transferring the MySQL database. But we will not dwell on their review in detail. If you are not familiar with any of them, it is best not to change (unnecessarily) the default values. Here you can configure the maximum compatibility with older versions of the DBMS and how the tables will be saved. Only data or structures can be exported. We will copy the tables in full (structure and data option).

After setting all the parameters to create a copy of the database, click "OK" at the bottom. As a result, we get a duplicate database, which can be easily transferred to another server. By default, the generated file is saved in your browser's downloads folder.

We import
With phpMyAdmin, you can not only create copies of the entire server, databases and individual tables. The program allows you to easily transfer MySQL data to another instance of the DBMS. This process is very similar to exporting a database. phpMyAdmin is able to connect both separate tables to the database and several databases to the server at once. To attach tables to the left in the list, select the required base, and then go to the "Import" tab.
To attach a base (or several bases) to the server, immediately go to the indicated tab. Then, in the "File to be imported" section, mark the "Browse your computer" item, and through the explorer indicate the location of the database file.
Here you need to specify the encoding in which the data in the imported source is presented. You should be more careful with this parameter, otherwise you will get real “hieroglyphs” instead of lines in the tables, and you will have to hire a native Japanese or Chinese to decipher them. And with them in our area - a real deficit.

The most commonly used encoding is UTF-8, which is set by default. Therefore, even if you do not know exactly which one is used in the portable MySQL database, then it is worth trying this encoding. In any case, you can always delete the imported base, and then "re-upload" it with a different encoding.
I also hasten to disappoint the "zealous" fans of phpMyAdmin. This utility is suitable only for export-import of small databases (up to 2 "meters"). This value is quite enough for partial (phased) server transfer, which may be inconvenient and delay the whole process for a long time.

In the "Format" section, set the value "SQL". If necessary, enable compatibility mode. And also disable the automatic creation of a key value for columns with a zero value (depends on the structure of the imported source tables). And to finish importing, click "Ok".
If you are going to transfer the MySQL database from the backup, do not forget to delete the "original" source from the server before starting the import. Otherwise, you will receive an error message, since this database already exists.

If the process was successful, the program system will display a corresponding message.

Alternative software
I promised to introduce you to various DBMS administration software as you learn MySQL. So you can broaden your "professional" outlook, and choose the program that best suits your needs and type of activity.
Today we will test the portability of MySQL using a powerful, feature-rich application developed by the developers of the database management system. You can download MySQL Workbench from the official resource of the company. Several third-party distributions (and links to them), which will be required to administer the DBMS using this platform, are also described in detail.
I will repeat once again: the tool in question has powerful functionality, so we will consider only the one that is designed to import and export individual databases in SQL format. To do this, launch the program, click on the icon of the desired connection (if there are several of them).

In the new opened window on the left in the "Navigator" panel, select the desired tab (for export or import). I am importing a duplicate database created with phpMyAdmin.

To transfer MySQL data, go through the "Data Import" item. In the tab of the same name in the "Import Options" section, select the second option (indicated in the picture).

Since we do not have any schemes, at the bottom we click on "Start Import". The next tab "Import Progress" displays the status of the transfer of the specified file. This option can come in handy when importing large amounts of data.

After the end of the MySQL migration, db1 will appear in the list of databases, a duplicate of which we have created using phpMyAdmin.

Well, while I was "hiding" my MySQL database, all the relatives left. Since I was busy, and there was no one to replenish the food base of the refrigerator. This is how my favorite DBMS saved me from a "related" misfortune. For which many thanks to her.
In connection with the move to new hosting, I had to master the basics of transferring the MySQL database. By the way, I use MaxSiteCMS as the CMS for my blog. And I bought a new hosting, or rather a virtual dedicated server from Adman.
I have been using my own script for a long time to create site and MySQL database backups. Which I wrote about in the article. But we have not yet had to take advantage of the results of the work done. Which of course did not upset me, since the previous hosting worked properly and data recovery was not required.
How to save a MySQL database
Let me remind you that it cannot be copied simply by overwriting a file.
And to save the dump, you need to do the following in the console:
Mysqldump -u username -p databasename> databasebackup.sql
How to repair MySQL database
Since I already had a backup copy of the database, the previous instruction was not useful to me. And to restore you need to use the command:
Mysql -u username -p newdatabasename< databasebackup.sql
Using the DirectAdmin panel; Using the phpMyAdmin web interface; Using the Sypex Dumper script; Using the server command line
Method # 1: Export using DirectAdmin panel
In the DirectAdmin panel there is a section in which control over the databases is performed, the MySQL Management section. This section displays a list of user databases and basic controls:
creating and deleting a database;
database editing (phpMyAdmin interface);
recovering a damaged database;
checking database tables;
optimization of database tables;
database import;
database user management;
database export;
At the moment we are interested in the last point. Each database has a download link
In this case, the browser will prompt you to save the file to your local computer.<имя базы>.gz, in this example it is the user_database.gz file. The file is provided in a compressed format like a gz archive.
Method # 2: Export using the phpMyAdmin web interface.
phpMyAdmin is an open source PHP web application that provides a web interface for MySQL administration. phpMyAdmin allows you to administer your MySQL server through a browser, execute SQL queries, and view the contents of databases and tables. The application is very popular with web developers, as it allows you to manage the MySQL database using a friendly interface, without the need for complex SQL queries to perform simple tasks.
To go to the phpMyAdmin web interface, select the appropriate item in the Direct Admin panel:
To access phpMyAdmin, you need to enter the login and password of the database user that you specified when creating the database. The first thing we need to do after entering the phpMyAdmin interface is to select the database we are interested in from the list:
Let's consider each point in more detail.
1. Export. This item allows us to highlight the tables that need to be included in the database backup. By default, all tables will be included in the backup.
2. Format of the backup. There are several backup formats to choose from, in this case we choose the SQL type. The rest of the methods are used when performing specific tasks and are used very rarely.
3. A very important point is the "Save as file" checkbox. If this checkbox is checked, you will be prompted to download the backup. Otherwise, the text version of the backup will be displayed in the form of MySQL queries.
4. File name template. By default, the file name will look like this:<имя базы>.<формат файла>, in our example it is user_database.sql.
5. Compression. This item allows you to select the compression method for the file:
without compression, i.e. the file is in sql format, the file size will correspond to the size of the database;
zip, i.e. a file in the zip archive format, the file size will be reduced by archiving the backup copy;
gzip, i.e. file in .gz format, the file size will be reduced by archiving the backup copy;
After selecting all the necessary parameters, just click the "OK" button and wait for the backup to be prepared. If the database is large, it may take some time to prepare the backup. As a result, you will be prompted to save the database backup file to your local computer.
Method number 3: Export using the Sypex Dumper script.
Sypex Dumper is a software product (PHP script) with which you can easily and quickly create a backup copy (backup, dump) of a MySQL database, as well as restore the database from a backup copy, if necessary. The official website of the script: http://sypex.net/. On the site you can download the Sypex Dumper script itself for free, and familiarize yourself with the documentation for working with this product. Sypex Dumper allows you to work with databases of almost any size. We will consider the operation of the script using the example of Sypex Dumper Lite 1.0.8, this version of the script is the easiest to use.
Download the script itself, unpack the archive and upload the dumper.php file to your server, to the public_html directory. For the script to work correctly, you will need to create a directory for storing backup copies (dumps) of databases. To create a directory, go to the File Manager of the Direct Admin panel, navigate to the public_html directory and create a new backup directory.
Let's go directly to working with the Sypex Dumper script. The script is called from the address bar of the browser: http://example.com/dumper.php, where example.com is your domain. The script will prompt you to enter your username and password. You will need to enter the username of the database user and the password of the database user that you specified when creating the database.
After that, the script will offer to select an action on your databases: "Backup / Create a backup copy of the database" and "Restore / Restore the database from a backup copy". We are interested in the first point.
The item "DB" allows you to select the required database from the list of your databases. The table filter allows you to specify the tables to be included in the backup. More detailed information about filters can be found on the site of the script developer Sypex Dumper. In the "Compression method" item, you can specify whether to use Gzip compression when creating a backup (compressed file with the .gz extension), or whether the backup will be saved in .sql format. The Compression ratio item is used only if the compression method is Gzip. The higher the value of this parameter, the smaller the file size will be.
After selecting all the options for creating a backup, click the Apply button. The backup will start, the process itself will be displayed on the monitor screen:
After the completion of the process, you will be provided with a log of the backup, as well as an offer to download the backup file. If you want to continue working with the Sypex Dumper script, click the "Return" button. It is worth noting that the backup created by this script will be stored in the backup directory that we created previously, i.e. it is not necessary to download a backup copy, it can be stored on the server in the backup directory.
Method # 4: Export using the Sypex Dumper script.
This method is available only to those users who have access to SSH (Secure SHell, remote control of the operating system). To export a backup copy of the database, you need to connect via SSH to the server (for example, using the Putty ssh client, if you have a Windows operating system, or using a terminal, if you have a Linux operating system).
After connecting, in the command line, just run the following command:
mysqldump -uUSER -pPASS DBNAME> /path/to/dump.sql
Where "-u" is a parameter that specifies the name of the database user to connect (USER), “-p” is an option that specifies the password for the database user to connect (PASS), DBNAME is the name of the database, “/ path / to /dump.sql "- full path to the database backup file. Let's look at the command using our example. Let's say the backup file is located in the domains / example.com / public_html / backup directory (where exapmle.com is your domain name), the database username is "user_user", the password is "Ide2eib6 ?, the database name is" user_database ", the name backup - dump.sql, the backup file is located at the path domains / example.com / public_html / backup /.
In this case, the command to import the database will look like this:
mysqldump -uuser_user -pIde2eib6 user_database> domains / example.com / public_html / backup / dump.sql
If, after executing this command, the operating system does not report any export errors, then the backup has been successfully exported. The size of the database backup does not matter.
The considered methods are universal, and allow you to solve any problem of exporting databases.


Prolongation of registration of participants in the "Living Classics" competition!
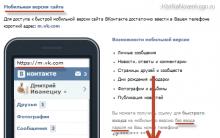
Who deleted me from friends on VKontakte All friends disappeared from the contact
Which operator was the best in Russia
Double cassette tape recorder
"VK" can be closed for a long time