In the modern information world, everything is tied to personal computers, most of them work under the control of the Windows operating system. Most likely at home you also have Microsoft systems installed. These systems are good for everyone, but they can also be buggy. Therefore, it would not be superfluous to know about the installation of operating systems. In this article I will try to tell you as easily as possible how to install windows(Windows XP).
Let's look for the image on the Internet. To do this, you can enter in the browser line windows xp sp3 download... Many resources recommend installing clean builds of Windows XP, you can find them by typing in your browser windows xp msdn... The choice is yours. Personally, I like the Windows XP builds from IDimm. You can find them by asking in the browser line idimm.
At the moment, these assemblies have the following name: Windows XP SP3 IDimm Edition Full / Lite 24.12 RUS (VLK) (2012) Russian. Those. there are two assemblies: Full - full and Lite - lightweight. The VLK sign says that this assembly does not require activation. The only thing that may be required is a key. Find it in the information when you download the image and save it. In the same place, read the difference between the full and light versions and decide which one you need. I like the full version.
Another plus of these assemblies. They include a package of drivers "AHCI MassStorage" for the ability to work in AHCI mode. This mode is responsible for supporting NCQ technology, which can significantly increase the performance of the drive and, therefore, the system as a whole. Therefore, we will install the operating system in AHCI mode.
You can download the image from the site http://idimm72.ucoz.net/, but it's not convenient and slow. It is better to find and quickly download this assembly at. For example or.
The downloaded file has the name: WindowsXP_SP3_IDimm_Edition_Full_v.24.12.isо.
Before writing a file to disk, you need to check to make sure that no error occurred during the download process and the downloaded image is 100% identical to the original.
File Hashes Tab
Copy the MD5 amount shown below and paste it into the Hash Comparison: field. If the file is identical to the original, a green "bird" will appear instead of a picture with a question mark, if not, a red cross will appear.
At the beginning of the download, you should see the following window. We don't touch anything. We wait

A menu appears with a choice of several boot options. We choose Semi-automatic installation of Windows XP.

Windows XP installation disc menu
The difference between a regular and a semi-automatic installation of Windows XP is that in the latter, user participation is excluded as much as possible.
After the selection begins installing windows.

Usually, only 5 GB is enough to install Windows XP, but if you plan to install programs on the system disk (the disk on which the operating system is installed), then it is recommended to make it larger.

Selecting a partition to install

Setting the time and date
We again get to the main installation window

The main Windows installation window
Windows XP reboots after installation completes

You will also be asked to wait a while.

In the next window, you must enter the user or users who will work at the computer. You must enter at least one user

Computer users
Operating system installation complete


The installation process for additional programs is as follows

Installing selected programs
Windows XP installation completed successfully if you see the picture below on your

The operating system is installed.
Installing drivers
Output
The article considered how to install Windows XP... Namely: where and how to download the operating system image, how to burn the downloaded image to disk, how to directly install the operating system and how to install the drivers. It will be difficult and time-consuming to install for the first time, but each time you get it easier and faster. In fact, the operating system is the same program as others, just with minor installation nuances.
It may seem strange to someone that in 2014 I am writing an article on installing such an old operating system. But as practice shows, people still often contact me with a request to install Windows XP. In addition, more than 30,000 queries “installing windows xp” were entered in the Yandex search engine alone over the past month, which indicates the continued popularity of this version of Windows. And this is not surprising. There are many users who have become so accustomed to this operating system over the years that they do not want to explore new ones. Everything suits them, because under Windows XP you can also while away hours in games, the Internet, and various applications. It's a matter of habit, what to say here 😉 There are also quite a few people who own old computers. They simply have no choice, even if they wanted to install something fresh.
I will go directly to the essence of the article. To begin with, I strongly recommend that you read my notes "" and "". Also, if you install a pirated version of Windows, you must write down the product key, without which the installation will be impossible. The key can be viewed on the site where the Windows image was downloaded, in the description of the distribution. Another key can be in one of the text files of the image. Some pirated Windows builds show you the key at the very beginning of the Windows installation. For licensed Windows, the key can be found on the sticker of the original disc box.
If you already have a bootable USB flash drive or disk, and in the BIOS you were able to set the computer to boot from the appropriate device, then you can start installing Windows. Insert the bootable USB flash drive into the computer's usb port or the CD / DVD disc into the optical drive, restart the computer. If you install the system from a disk, then a white inscription should appear on a black screen with the text "Press any key to boot from CD ...". Immediately press any key to get into the Windows Installer. If you install Windows from a bootable USB flash drive, then you may have a boot menu, where you must select the phrase "Windows 2000 / xp / 2003 setup" or "Install Windows XP" (depending on the method with which you created the bootable USB flash drive) , press Enter. Next, select the 1st line with the text "First part of Windows XP setup from partition 0", press Enter again. The Windows Installer should start (blue screen titled "Install Windows"). We wait for a while, do not touch anything. When the screen with the text "Welcome to the Installer" appears, press the Enter key.
Next, you will be forced to familiarize yourself with the license 🙂 Press the F8 key on your keyboard. A screen appears where you must select which logical drive you will install Windows on (drive with the letter C is recommended), press Enter. Attention, all information from the selected disk will be destroyed! If instead of logical disks you have “Unallocated area” displayed, then you will have to create disks manually. Press the C key and assign the volume of the future system disk (preferably at least 50,000 MB), confirm the selection with the Enter key.

In the next window, select "Format the partition in the NTFS system", again Enter. After formatting, the process of copying Windows files to the hard drive begins. Wait for the computer to shutdown and reboot. After rebooting, it is advisable to go into the BIOS and set your hard disk as a boot device (just as you set your USB flash drive or optical drive as a boot device).

The Windows installation process begins. You just watch until the computer asks you to intervene in the installation process. In the "Regional and Regional Standards" window, leave everything by default, if you have the same as in the picture below (if not, then select the country and language manually), click "Next". In the window "Program ownership settings" write what you want in the "Name" line, "Next" again.

In the next window, enter the product key (I wrote about it at the beginning of the article), click the "Next" button. The next window with the time and date settings, change the time zone and date, if necessary.

In the next two windows, you do not have to change anything, just click "Next".

You can go for coffee or tea, Windows installation will continue without your participation. All that remains is to perform the basic setup at the end of the installation. Do as shown in the pictures below.


As a result, a window will appear with the screen parameters, just click "OK" and then "OK" again. The Windows XP desktop is loaded. You did it! It remains only and.
Best regards, Alexander Molchanov
Hello everyone, today we will talk about how to install Windows XP to your computer. I will write several options, for example, installation from a USB flash drive and in other articles - to a virtual machine. Windows XP is a very old system that a lot of people feel nostalgic about, so let's try installing it on a PC again and do a little bit of work!
By the way, before installing Windows XP, I advise you to read the material: "". This is to set the boot from disk to the first place. If you do this from a USB flash drive, then read about, with which you can not rearrange the drives, but immediately select the USB flash drive to boot.
Preparing to install Windows XP from disc
If you have an old distribution kit with Windows XP lying around, then let's proceed directly to the installation. In the absence of a distribution kit, I recommend downloading the image from the following links:
https://win-torrent.net/windowsxp_torrent
http://free-max.ru/windows_xp
On them you can find images without keys.
We enter the BIOS and move to the tab Boot or Advanced(depending on the BIOS version). We get into the parameter Boot Devices Priority and using the F5 and F6 keys, move the desired device to the first place, for example, a CD / DVD drive. Or use Enter to select the desired boot device.

To save the parameters, you need to go to the tab Exit and choose an option there "Exit & Save Changes".

If you have another BIOS version, for example - Award, you can proceed as follows: open the section "Advanced BIOS Features".

Choosing a parameter First Boot Device... Nearby there is the HDD0 option, which is responsible for booting from the hard drive. Press Enter and select CDROM if booting from disk.


To save the changed parameters, go to the option in the main window "Save & Exit Setup"... A red confirmation window will appear, where we press the button Y.

How to install Windows XP using a disc
As soon as you have done everything necessary and exited the BIOS while saving the settings, you should see such a black window with the phrase "Press any key to boot from CD" which means "press any key to boot from disk". Be sure to press any key for the installation to go.


Our gaze comes off the welcome menu. There are several parameters here that we can use:
- Proceed directly to the installation of Windows XP.
- Recover Windows XP using the Recovery Console.
- Exit the installer.

Naturally, it is necessary to select the first option by pressing the key ENTER.
In the next window, we accept the terms of the license agreement using the key F8.

Now we need to deal with the sections. In this example, we see three sections. You can delete all partitions to put them together (done with the D key), or install into a ready-made partition. I will choose a disc called "Section 2", it just has the letter C. The choice is made with the Enter key.

In the next window, you need to select the type of formatting. You can choose full formatting to completely clear the partition table, but this is not required. Choosing a parameter "Format a partition in the NTFS system<Быстрое>» .


As soon as the installation files are copied to the disk, a window will appear asking you to specify the regional data. In this case, click Next.

If you are asked to enter the product key, enter. In case you downloaded another image, the key may be embedded in it, so you will not see this window.
Another window where we are asked to indicate the date and time. Then we press the button "Further".
 "Skip" how to uninstall Windows.
I propose to consider a few links
You will also need device drivers installed in your computer (chipset, sound card, video card, webcam, etc.)
Burning the Windows XP installation disc
To burn the Windows installation disc, we need a disc image, an image burning program, a CD burner, and the CD itself.
Download Windows XP SP3 Professional disk image
Any program for burning discs that supports burning from an iso image will work, for example, Nero or DeepBurner, which can be downloaded for free.
So, we downloaded the disk image, installed the DeepBurner program. Now let's take a look at the process of burning a disc.
Insert a blank CD-R disc into your drive and launch DeepBurner. After launching DeepBurner, it prompts you to select the type of project to create.
We choose Burn ISO image and click Next.
I don't know about you, but my project window opened in a compressed form. Therefore, you need to stretch it by grasping the lower right corner with the mouse or expand it to full screen so that it looks like in the figure below.

In the project window, click the button with three dots (Browse) and select the file of the downloaded iso-image of the Windows XP installation disk. In our case, this is the file ZverCDlego_9.2.3.iso.
Now you need to select the recording speed and press the button Burn ISO... In order for the disc to burn better, the speed should be selected slightly less than the maximum. Now it remains to wait for the disc to be written. After the Windows XP SP3 installation disc has finished burning, the drive tray will pop out on its own. The disc is ready!
Windows XP(internal version - Windows NT 5.1) - operating system (OS) of the Windows NT family of Microsoft corporation. It was released on October 25, 2001 and is an evolution of Windows 2000 Professional. The name XP comes from the English. eXPerience(an experience).
Unlike the previous Windows 2000, which came in both server and client versions, Windows XP is purely a client system.
According to web analytics, from September 2003 to July 2011, Windows XP was the most used operating system for accessing the Internet in the world. As of February 2013, Windows XP was in second place after Windows 7 with a share of 19.1%. The maximum of this value was 76.1% and was reached in January 2007.
How to install Windows XP from disk via BIOS
Now it's time to review the process itself. installing Windows XP on a computer from a disk.
First of all, you need to configure boot from the floppy drive in the BIOS. To do this, go to the BIOS menu. How to do this may differ depending on your motherboard model. In most cases, this menu can be accessed by pressing the button Del(on some models of motherboards, you need to press the key F2) after turning on the computer (during the startup splash screen). Better to press this key several times to be sure.
The BIOS menu differs depending on the manufacturer and version. There are two main types of BIOS: AMI and AWARD.
Below are screenshots of AWARD BIOS. You need to go to the menu Advanced BIOS Features.

Here in the menu item First Boot Device press Enter and select CD-ROM

After that, press the Esc key to exit to the previous menus, where to select the item Save and Exit Setup... That's it, now the first device to boot your computer will be a DVD drive. You can go to the process installing Windows XP from disk.
Now let's look at how to set boot from disk to AMI BIOS
Selecting a tab Boot, and in it we go to the menu Boot Device Priority

We put the first boot device (1st Boot Device) CD-ROM or DVD-ROM (your drive model)

In some BIOS versions, the first device is selected after pressing the Enter key on the desired item and selecting a device, in other devices they move up and down using the F5 and F6 keys or + and -
After that, you need to exit to the main menu with the Esc key and go to the tab Exit... Select item Exit and Save Changes to save changes and exit.
Now let's look at the process itself. installing Windows XP from disk to computer.
We insert the installation disc into the drive and restart the computer. The disc menu below appears.

Selecting an item Installing Microsoft Windows XP SP3 in manual mode and press Enter.
It should be warned that installing Windows XP SP3 on a computer takes about 40 minutes. So please be patient.
On the first screen, press the Enter key to continue with the installation.

In the next step, read the license agreement and press the F8 key
Now select the disk partition where you want to install Windows XP. If the hard disk is new and not yet formatted, you need to create a partition by pressing C.
Select the section and press Enter. If the section already existed, you need to confirm the installation in this section by pressing the key WITH.

In the next step, the installer prompts you to format the disk. Selecting an item Format partition in NTFS system (Fast) and press Enter.

Press the key to confirm formatting. F
After formatting, the process of copying the necessary files to the hard disk will begin.

When the files are copied, the computer will restart.
When the computer boots, it will start again from the bootable CD. In the disc menu, select the item
A window for selecting driver packages for unpacking and installation will open. These are built-in drivers for many devices included in this assembly. If you are installing Windows XP from a Microsoft distribution kit, this window will not appear.

Select the required driver packages by ticking the boxes and click OK. If you don't know exactly which drivers are needed and which are not, select all. If you have disks with drivers for all devices (motherboard, video card, etc.), then uncheck all the boxes to speed up the OS installation process. In this case, you will need to install the drivers manually from the disks after the Windows installation is complete. Read more here: How to install Windows XP drivers.
After clicking OK, the unpacking of the driver packages will begin, and when it is finished, the Windows installation will continue.
The next window for selecting the language and regional standards will appear. If the distribution kit is the Russian version of Windows XP, then nothing needs to be changed here.


In the next window, you must enter the product key and click the button Further.
A window will appear in which you need to enter the computer name and administrator password. Nothing can be changed in this window. Then the administrator password will not be set.
In the time and date settings window, set the correct date and time, as well as the time zone.

In the OS network parameters window, select Common parameters and click Further.

In the workgroup window, write the name of the workgroup or domain in which the computer participates. If you don't have a home or office network, you can leave everything unchanged and click Further.

After that, the installation of Windows will continue, after which the computer will automatically restart.
We go into BIOS and set it to boot from the hard disk first, as described at the beginning of the article. We exit BIOS with saving changes.
Now before how to completely install Windows XP on a computer the last minutes remained.
At boot, the system will offer to automatically adjust the screen resolution. Click OK.
In the Windows XP welcome window, click Further.

A window will appear prompting you to select the Windows update mode.

We choose Postpone this action to disable automatic system updates and press the button Further.
The next window will ask you to set up your Internet connection. Push Skip.
We refuse the offer to register by selecting the item No, some other time and press Further.

In the final window, click Ready.
That's all! Now you know how to install Windows XP from the installation disc to your computer.

It remains to install drivers and programs, but this is beyond the scope of this article.
Probably every second computer site has an article about how to install Windows XP operating system... I thought that even if my blog is no exception and it will remain on it. Windows XP installation instructions.
You can install Windows on a blank hard drive; over an already installed system; or as a second (third, etc.) operating system. Each of these options has its own characteristics. Today I want to tell you how to completely reinstall the existing operating system, while formatting the system drive.
In general, you can start the installation of Windows XP in two ways: 1) by booting from the installation disk; 2) directly from the installed system. The first option is preferable, and we will consider it.
A small digression: I did not take the screenshots used in the article myself. I borrowed them from the site compbegin.ru. I hope the author will not be offended by me for this 🙂
So, to install, we need boot disk with Windows XP operating system. Only such a disk contains a special hidden section with important system files that will allow the computer to boot directly from this CD.
We turn on our computer and first of all we go to the BIOS to configure the boot from the disk. To do this, immediately after switching on, press the key on the keyboard Delete or F2(other keys can also be used, so watch the prompts on the screen carefully).
Once in Bios, you need to find a section with the word Boot, and then rearrange the boot device order so that the CD-ROM comes first. Depending on the BIOS version, the device from which the computer will boot is either selected from the list, or moved upward using the keys F5 / F6, +/-
.
After the changes have been made, we exit the BIOS, saving the settings. Before exiting, you need to insert a disc with Windows XP into the drive so that the computer can boot from it.
If any Windows operating system has already been installed on your computer, after restarting you will see “” on the screen (it means “Press any key to boot from CD”). Accordingly, you need to press any button on the keyboard. If you delay for more than 10 seconds, the boot of the current operating system installed on the hard disk will start (then you will have to restart the computer).  The Windows XP installer shell will appear on the screen. The OS checks the hardware installed on the computer and starts downloading the installation files.
  At the end of this process, a window will appear prompting you to start installing Windows. Click on Enter on keyboard.
  Next, we accept the license agreement by clicking F8.
 It will then search for previous copies of Windows installed on your computer. If any are found, you will see a screen listing these systems.
  It will also be offered here:
1) Restore the found copy of Windows by pressing the R key .
Recovery can help if Windows system files are damaged, deleted or replaced with infected files.
If you select this item, you will have to go through the complete system installation procedure, during which all system files of the old copy will be replaced with new ones from the CD. All your data, settings and installed programs will not disappear anywhere.
2) Install a new copy of Windows by pressing the Esc key .
Because we want to install a new Windows XP, then we press now on the keyboard Esc.
You will not see a window with a list of installed systems if you are installing the system on a new hard drive, as well as if the previous copy of Windows has a different edition or service pack.
Because in my case, the operating system was already installed on the computer, then the hard disk was already allocated to logical disks. Therefore, a window appears listing all the sections found.  If the current partition of the hard disk does not suit you, you can delete the existing partitions by pressing the key D(you can select the desired section using the arrows on the keyboard). After deleting a partition, the area it occupied becomes unallocated, and all data on this logical disk is deleted.
I am satisfied with the existing structure of the hard disk, so I use the arrow on the keyboard to select the partition where the system will be installed. Let it be C: Section2 (SYSTEM)... Then I press Enter.
If the following window appears, just click Enter. Then select "Format partition in NTFS" and click Enter.
 The formatting process starts:
  When it finishes copying Windows XP files to your hard drive will start:
 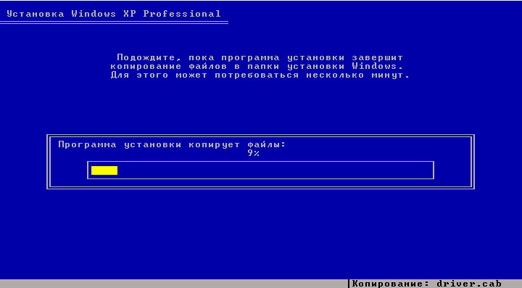 After copying is finished, the computer will restart. If after rebooting a screen appears with the inscription “” - do not press anything (just wait 10 seconds). Otherwise, the installation will start over.
Next, Windows will offer to configure the language and region. Click Next.  In the window “Program ownership settings” enter a name (for example: Ivan) and the name of the organization (for example: Nome). Click Next.
  The Product Key window appears, prompting you to enter your Windows XP serial number.
  Then come up with and enter the name of the computer under which it will be visible on the network (use Latin letters). The administrator password can be left blank.
  In the “Time and Date Setting” window, check all the parameters and click “Next”.
  You will see the next two windows only if the Windows XP distribution contains a driver for your network card. In the first of them we leave the marker in the “Normal parameters” position, and in the second we agree with the name of the WORKGROUP workgroup and just click “Next”.
 Windows will then start installing the network and copying the files. After the installation is complete, the computer will reboot and offer to automatically adjust the screen resolution - click "OK".
  The welcome screen will appear - click "Next".
  The next window will ask you to enable automatic updates. You can select "Postpone this action" and click "Next".
  If the network card driver was installed during the installation, then two more windows will appear in front of you. In the first "Test your Internet connection" click "Skip". And in the second, put the marker in the position “No, some other time” and click “Next”.
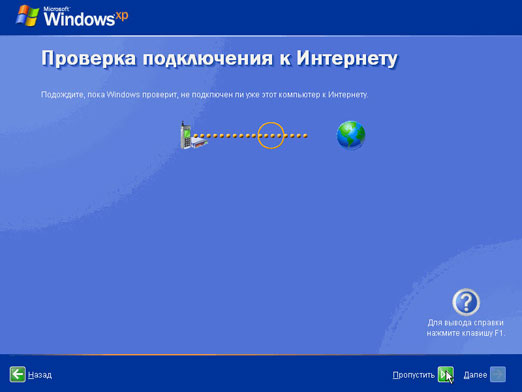
 The account creation window will appear. In the field “Your account name” enter any name in Latin letters and without spaces. You can also create a second, third, etc. now. users, but for now, one is enough. Click Next.
  This completes the installation of Windows XP. After clicking on the “Finish” button, the Desktop will appear.
 Do not forget to return the computer boot from the hard disk to BIOS.


Prolongation of registration of participants in the "Living Classics" competition!
Who deleted me from friends on VKontakte All friends disappeared from the contact
Which operator was the best in Russia
Double cassette tape recorder
"VK" can be closed for a long time