To begin with, it is worth noting that improper connection of the car radio can lead to low-quality sound of low power or damage to the speaker system. If such a warning does not scare you and there is a great desire to do everything yourself, then we will try to understand this issue together and understand how to properly install the car radio. To complete the work, you will need electrical tape, a tester and a screwdriver. In time, the entire installation process can take from 5 minutes to several hours. The following recommendations are applicable in 85% of radio assembly cases.
Standard ISO connector of modern radio tape recorders
The car has several configuration options with special connectors and conductors for installing an audio system:
- The conductors in the car are routed to the rear and front speakers, while the power wires come from the battery, and the positive cable is equipped with a separate fuse. The wires are connected to a special connector, which is identical to the socket in the radio. The cord from the antenna is also brought out and fits the installed audio system.
- All the necessary wires for installation are brought and connected to the connector, however, the plug does not fit into the car radio socket.
- There are no speaker wires in the car, and power wires are not routed out. Also, wires may be present, however, incorrectly connected.
We will not dwell on the first option in detail, since everything is clear here and you only need to connect the existing power wires and insert the connector. In any case, it is imperative to check whether everything is ready for the new audio system and make sure that the wiring and speakers correspond to the power output of the radio.
Consider in detail the second option, when the car wiring connector does not match the audio system socket. The problem is that almost every company installs individual types of connectors for connection on their radio tape recorders. Different models from the same manufacturer may have completely different outputs. In this case, most often the car radio comes with a separate adapter for the ISO standard.
Before you take any troubleshooting steps, you must finally make sure that the adapter is not included in the kit or it does not fit. There are two ways to get out of this difficult situation:

To prevent confusion, the connector must be connected to the radio and bite off the rest. The connection of the wires of the audio system and the car is carried out in accordance with the color coding. The connections are best soldered and then insulated with heat shrink tubing.
In the event that the colors of the wires differ and do not match, they will need to be dialed, and also, most likely, the missing wires will need to be laid. To perform this action, you should arm yourself with a tester or a special multimeter with a squeaker and a separate 9 volt battery.
Attention! Any manipulations with the wiring are carried out only with the battery disconnected!
We will not dwell on the process of dialing with a multimeter in detail. Consider why a battery is needed and how it is used.
If you ring the loudspeakers and do not disconnect the wires from them, two wires should ring. It will be a pair for a specific speaker. It is to determine their polarity that you need a battery. It is connected to a pair of wires, and then you need to monitor the movement of the speaker cone.
If the diffuser moves outward, then the polarity is correct. The wire that was connected to the plus of the battery is marked as "+", and to the minus - "-". If the diffuser is retracted, then the polarity is chosen incorrectly and the wires must be marked the other way around. The battery connects to the speaker for only one second.
Marking and color coding of wires
Do-it-yourself installation of a car radio will require knowledge of wire marking:
- Black (denoted by GROUND or GND). Minus the battery;
- Red (marking ACC or A +). Plus the ignition lock;
- Yellow (indicated by BAT or B+). Plus from the battery;
- White with stripe (FL- marking). Minus the front left speaker;
- White without a stripe (indicated by FL+). Plus front left speaker;
- Gray with a stripe (marking FR-). Minus the right front speaker;
- Gray without stripe (denoted by FR+). Plus right front speaker;
- Green with a stripe (marking RL-). Minus the left rear speaker;
- Green without stripe (designation RL+). Plus left rear speaker;
- Violet with a stripe (marking RR-). Minus the right rear speaker;
- Violet without stripe (designation RR +). Plus the right rear speaker.
In addition to the main wires, the audio system may have additional ones, say blue with or without a white stripe, which is designed to connect the antenna, orange - to turn on the backlight, and others.
How to connect a car radio
Consider in detail the option when you need to install and connect the audio system from scratch. At the first stage, you need to buy a complete set of wires for connecting speakers and power. The length of the wires depends on the features of the car and the chosen method of installation. It is best when they are as short as possible and do not have additional twists. A good solution would be to purchase copper stranded wires with silicone insulation. Their thickness should be enough to ensure the most efficient operation of the audio system. Power wires with a cross section of 4 mm. sq. suitable for car radios up to 120 watts. In this case, the wires to the speakers with a cross section of 1-2 mm. sq. quite enough.

The positive power cable must be at least 4 mm2 thick. and be equipped with a fuse
Often in the same set with loudspeakers there are connecting wires that do not correspond to the required thickness.
Connecting speakers
Modern audio systems are most often designed to serve 4 speakers. These are two rear speakers and two front speakers. Radio tape recorders delivering power of 30 W or more per channel have four pairs of wires. Each pair has its own color marking. Also in each bundle there is a wire without a strip (plus) and with a strip (minus).
Do not confuse the polarity, although this is not so scary. It is strictly forbidden to ground a wire with a strip (minus) that comes from the radio tape recorder to ground, since it has absolutely nothing to do with the total mass of the car. The speakers themselves are equipped with two terminals (one narrow, the other wide). Low power radios can have only one positive wire for each speaker. In such a situation, the minus of the speakers must be connected to the common minus of the audio system. The positive wire coming from the car radio is attached to the wide terminal, and the negative wire to the narrow one.

Pay attention to the polarity when connecting the speakers to get the best sound.
Proper phasing should be given special attention. If the connection of the pluses and minuses is correctly made, then you can expect that there will be no problems, and the audio system will work properly. In this case, a situation may arise when the sound quality does not meet the required expectations. There is sound, the volume is excellent, however, low frequencies are practically not felt, and the increase in bass changes absolutely nothing.
The described circumstances are a sign of incorrect phasing. It will be necessary to check the connecting wires very carefully, and reconnect them where necessary.
There is another easier way to track the correctness of phasing:
- The sound needs to be transferred completely to the front speakers, and then set the balance to one speaker, for example, to the right one. The volume should be increased to maximum levels or until noticeable distortion appears.
- Next, the balance should be moved to the middle position, thereby distributing the volume evenly between the left and right speakers. If the phasing is done correctly, then the overall volume will increase significantly. A slight increase in volume, the absence of an increase in it, or the complete disappearance of low frequencies indicates incorrect phasing. Then you need to swap the wires on one speaker. The same procedure should be repeated on the rear row of speakers.
Almost all modern car radios use three wires of yellow, red and black to supply power. The negative of the battery corresponds to the black wire. Yellow is a plus of the battery and feeds power consumers of energy. If for some reason the yellow wire has deteriorated, it must be completely replaced with a new one of the appropriate section. The red wire is the plus of the ignition switch.

Detailed car radio connection diagram
First you need to figure out how to connect the black and yellow wires. Many motorists connect the black wire to the first free ground bolt, and the yellow wire is connected from the ignition or cigarette lighter. Actually this way is wrong.
By connecting these wires to the battery, you can get high-quality high-power sound. The wires themselves are best taken stranded, copper with a thickness of 4 square meters. mm. Stepping back 30-40 cm, a 10-20 A fuse with good insulation is installed on the yellow wire. The red wire also has a positive value, however, it must be connected to the ignition switch. And to be extremely precise, it connects to a circuit that is energized in the ACC key position.
It happens that motorists connect the yellow and red wires together. The advantage of such actions is that the audio system is constantly working and does not depend on turning the ignition on or off. Of course, the downside in this case is that the radio is in standby mode all the time. This will affect battery performance. The battery discharge rate will increase. This indicator depends on each individual radio, so it is rather problematic to specifically calculate how quickly the battery will be planted.
Antenna connection

Appearance of an active interior car antenna
The antenna can be passive or active. Connecting a passive antenna is very simple. To do this, you just need to insert the plug into the appropriate socket. But with the installation of an active antenna, you need to work a little, because you need to supply power to it. Most modern car radios have a special output. It is a blue wire with or without a white stripe and is labeled REM, ANT, or AMP. Sometimes there are two such wires. They are responsible for turning on devices that work only when the audio system is in use. In our example, it is the antenna that is such a device.
The question raised, how to connect the radio, and the direction of car audio is not just the topic of a separate article. In fact, this is a whole science, for the study of which there are a huge number of manuals, information and books. In the proposed article, we tried to focus only on the most important aspects and details of installing an audio system.
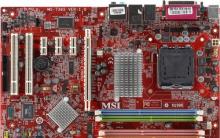
To install the SWAT CHR-4100 car radio on the nissan pathfinder, on the center console, you must first remove the cover with the holders, then the upper gear shift knob and then remove the lower trim as in the photo.


Using a Phillips screwdriver, unscrew the two screws and remove the frame (it is held on by latches).

The frame with the radio is held on by four screws, unscrew and remove the radio.
To connect the antenna, we need an antenna adapter or a regular connector for the radio.
Pinout of the main connector:
Brown (extreme) +12 V
Black - mass
Pink - backlight
Blue - ACC (+12V from ignition)
White "+" , pink "-" - PL column
light green "+", red"-" - PP column
light green "+", red"-" - ZL column
Brown "+", yellow "-" - RFP column
Steering wheel controls:
Wire between blue and red Rudder 1, opposite the mass of the steering wheel, next to the mass of the steering wheel from the left Rudder 1. The photo shows the pinout. Colors may not match, please check.

Then we connect and install the SWAT CHR-4100 radio instead of the regular car radio Atoradio Nissan AGC-0071RF.
We collect everything in the reverse order. The size of the radio tape recorder fits perfectly and without any gaps it is installed in the standard frame, this can be clearly seen in the photo.
Swat registered the trademark back in 2012. Now there are a lot of products of this brand on the shelves of stores and many are surprised, because. this is not a European or even a Japanese brand, but a Russian one. How did the Russian company manage to achieve such a high success in the production of car acoustics? Swat car radios, speakers, subwoofers, amplifiers of excellent quality and this is not the whole range of the brand.
ShGU or regular car radio
Initially, the founders of the brand planned to produce equipment of high quality and at the same time inexpensive. They wanted to break the stereotype: if it's of high quality, it means it's expensive. And they succeeded! Today you can safely buy a Swat car radio and not use it for 10 years without repair. This technique is reliable and has good technical characteristics.
At the very beginning, the company specialized in the production of regular car radios, which are now called ShGU. Many companies started with this, and ended with this. But Swat released its first models for Kia Rio and Hyundai cars, then the lineup was actively expanded. Radio tape recorders have already been produced for Camry and other mass-produced cars.
The main goal of the manufacturer was to create a head unit at an inexpensive price, but having all the functionality, namely:
- playback from USB and SD;
- disc player that reads all available formats;
- GPS navigator;
- bluetooth;
- Internet access.
1Din and 2Din car radios
Then 1Din devices appeared. In terms of style and design, the equipment is made for every taste, and the functionality is maximum. Then Swat 2Din car radios appeared, but only with extended functionality:
- Usb - 2 inputs;
- presence of bluetooth.
SWAT AHR-4180- a new model in the world of car music. Available in stores at a price of 15 thousand rubles. This is a 2Din device with a 7 inch touch screen. The case is made of high-quality coated plastic, which does not leave marks from the hands. Connectors for connecting individual modules are on the left.

The SWAT AHR-4180 car radio works on Android 4.4. Large icons can be seen on the monitor, making it easy to operate the device even when moving. The design is very concise, without unnecessary distracting buttons.
An amplifier is already built into this device, which distributes sound into 4 channels, each of which has a power of 50 watts. With the equalizer, you can adjust the sound to your liking. The radio tape recorder plays all existing formats, also plays music from a flash drive and SD card. A smartphone or tablet of any manufacturer is also connected. This is done via Bluetooth or USB. In addition, rear view cameras, as well as a monitor or remote control can be connected to the device. This turns the radio into a combine that performs all the functions needed by the driver.
SWAT WX-218UB- An interesting model with a nice design and unlimited functionality. Illumination in the form of stripes complements the already completed design. Any color is selected for the interior design of the car, in total you can choose 7 shades. The screen is slightly higher, and the main navigation button is located in the bottom middle.

There are also control buttons on the right and left. The entire outer panel is symmetrical, the buttons on both sides are mirrored. Keys on the panel, depending on the goals performed, of different sizes and shapes. Therefore, their purpose is easy to remember and you can control them even by touch. All buttons, thanks to the backlight, are visible even in complete darkness. Device Features:
- aux connection;
- support for SD cards;
- playback from flash media;
- charging from usb;
- usb 2 connectors - for charging and data transfer;
- there is a connector for connecting a rear view camera.
Universal 2DIN car radio designed for listening to music and watching videos in the car. The 7 inch TFT touch screen allows you to view videos in various formats, including AVI and MPEG4, as well as manage settings. The package includes an infrared remote control. For ease of setup and volume control, the main controls are located on the side. The car radio supports both USB and SD storage devices, as well as Bluetooth devices, such as a tablet or smartphone. In addition to listening to music from your smartphone, you can have conversations through the audio system thanks to the microphone built into the front panel. In addition, an AUX input is provided for connecting audio sources. A 3-band graphic equalizer is used to manually adjust the sound. The amplifier built into the radio is designed for a maximum output power of 4x50 watts. It is possible to connect a subwoofer to the amplifier (there are 2 pairs of low-level RCA pre-outs on the back).
An RCA video input is provided for connecting a rear view camera. The RCA video output can be used to connect an optional rear passenger display.
Main characteristics of Swat CHR-4100:
- size: 2DIN;
- display: 7" TFT;
- 720P video playback;
- USB\Micro SD card support;
- support for steering wheel buttons;
- Bluetooth, A2DP audio streaming;
- FM tuner;
- format support: MP5, MKV, AVI, MOV, MP4, ASF, FLV, MP3, PMP, RMVB, MPG, VOB, FLAC;
- adjustment of high, medium and low frequencies;
- equalizer presets;
- remote control;
- rear view camera input;
- digital clock;
- output power: 4x50 W;
- outputs: RCA 2 pcs, video 2 pcs, subwoofer 1 pc.;
- inputs: AUX 2 pcs, video 1 pc.;
- GPS navigator;
- screen resolution: 800x480 px;
- display format: 16:9.
A bit of theory: the pinout of the ISO connector of the radio is a definition by the functionality of the contacts in the plugs, in accordance with their numbering. The ISO connector of the radio is a connector for connecting the car's factory radio, certified according to international standards.
Each of these connectors is made as an eight-pin rectangular plug, sometimes they are combined into one housing.
When trying to replace, for example, an auto player from Pioneer with a JVC, car owners are faced with a situation where the wires in the plug are mixed up or do not even fit the shape of the connectors. In order to solve this issue, you need to buy an iso plug, which is sold at any auto parts store. After that, and pinout the head unit connector according to the diagram.
Standard Wiring Diagrams


1DIN and 2DIN standards
All car radios can be conditionally divided into two types, which are installed by automakers.
- 1DIN standard (single block);
- 2DIN standard (two-block).
European brand cars prefer 1DIN.
| №1 | empty |
| №2 | empty |
| №3 | empty |
| №4 | Constant power |
| №5 | Antenna Power |
| №6 | Backlight |
| №7 | Ignition |
| №8 | Weight |
And Japanese, American and a number of Chinese car brands use the 2DIN standard.
Dual ISO connector
If you see 2 plugs, then one of the connectors connects “power” circuits to the radio, that is, current consumption sources are connected to it (in the diagrams with the letter “A” and is colored brown). The second connector is needed to connect acoustics (on the diagrams with the letter "B" and painted in black).

Adapters for ISO connectors
Now on sale there are many types of different adapters for ISO connectors from one model to another, so you can not solder the plug by connecting it to the radio, but by writing down the model, buy the desired adapter.

Pinout diagrams for ISO connectors for Pioneer radios


The model name of the Pioneer car radio, the connection diagrams of which are shown above, can be found from the file name of each diagram.
Remember: when you connect the device for the first time, you first need to supply power to the radio, and if it lights up and switches as expected, connect the speakers. Otherwise, you can burn not only the audio player, but also expensive car speakers.


Wargame: Red Dragon not starting?
Sad escobar "The face of the judicial system of Ukraine"
ROME Total War - how to unlock all factions?
How to turn off the TalkBack feature?
Overview of alternative firmware HTC Desire A8181 Bravo How to install the firmware file for HTC Desire