Kingston flash drives are reliable and durable, but they are also not immune to various failures. Sometimes the drive really "dies" and it is not possible to restore it. More often, there are situations when a USB flash drive can be brought back to life using a special utility for firmware.
Most often, Kingston dt100g2 and datatraveler flash drives break.
Is it possible to recover a USB flash drive
Signs that the drive can be recovered:
- When a flash drive is connected, a notification appears that a new device has been detected.
- The system prompts you to format the removable disk.
- The drive does not open, but appears in the explorer.
- Errors occur while reading and writing data.
These problems are eliminated by firmware of the controller or formatting the media, but if there is important information on the flash drive, then before performing any recovery procedures, you need to try to "pull it out". Use a recovery program like Recuva to extract or to avoid losing the files you need.
Search for a program for controller firmware
To recover, you will need a special utility for the Kingston flash drive. In order not to make a mistake and load the correct program, you need to know the drive controller model.
Method 1
You can view the necessary information on the website flashboot.ru in the iFlash section, using the VID and PID values of the flash drive as a filter.
- Connect the drive to your computer.
- Open the device manager (right-click on the "Computer" icon - Management).
- Find "USB Mass Storage Device".
- Right click and open properties.

- Go to the Details section and select the Hardware ID property.
Method 2
Another way to get the information you need is to download Flash Drive Information Extractor and click the Get Data button. The report will contain the lines "VID" and "PID"; use their value to find a utility that can correctly restore the Kingston Datatraveler flash drive.

You can download the program in the "Files" section of the flashboot.ru website. If there is no utility here, try to find it on other web resources. 
Recovery utilities
You can find the program you need without a controller model - just type the query "kingston recovery utility" in the search engine. In the results, you will see several utilities, among which there will certainly be programs such as Phison Preformat, AlcorMP AU698x RT, etc.
The problem is that Kingston flash drive recovery programs only work if they are compatible with the controller installed in the drive. Therefore, if you download the first available repair utility, it may not detect the connected media.
When the required program is found, you can start restoring it. Be sure to look at the instructions, which should be packed into the archive along with the recovery utility - perhaps the program has a special order of work. The general recovery procedure looks like this:

You don't need to do anything else: the program will fix the errors on its own and return the flash drive to a usable state. This completes the restoration of the Kingston flash drive; if the controller firmware did not help to fix the problem, then the cause of the incorrect operation should be looked for among the hardware faults.
There are several solutions for creating data backups:
- Applications built into the operating system... Microsoft Windows provides data backup methods that involve storing files and data on external or built-in storage media. All modern versions of Windows already include the ability to create a backup copy of the necessary files or the entire hard drive, if necessary. The functions provided by Windows are complete and independent, and are aimed at ensuring that you do not need to use third-party services or programs.
- Copying data manually... You can always use the old proven method of creating a backup copy of data - manually copying data to an external storage medium. This is a long time, but if you are working with a small amount of data, this solution may be quite acceptable for you.
- Online services... Recently, the most modern way of backing up data is gaining more and more popularity - these are numerous online services. Companies that provide backups of your files straight to the Internet. A small background application installed on the computer creates copies of the necessary data and stores it on a remote server. However, the volumes provided by such companies for storing your files in the free version do not allow using them as an integrated solution. Often the space offered for backing up data does not exceed 10 GB, so there is no need to talk about creating a backup copy of the entire hard disk. Such services are more likely aimed at backing up a separate number of files.
- Disk imaging... It is the most complete data backup solution for advanced users. This method involves the use of a third-party program to create an image of the entire disk, which can be deployed, if necessary, on another storage medium. With the help of this solution, you can in a short period of time get access to all the data that was on the disk at the time of its backup: documents, programs and media files.
Mirex flash drive models for 64gb, 32gb, 16gb, 8gb, 4gb, 2 gb:
- ARTON;
- BINAR;
- KNIGHT;
- RABBIT;
- ROCKET DARK;
- DRAGON;
- HARBOR;
- CHROMATIC;
- TURNING KNIFE;
- Crab;
There are several solutions for creating data backups:
- Applications built into the operating system... Microsoft Windows provides data backup methods that involve storing files and data on external or built-in storage media. All modern versions of Windows already include the ability to create a backup copy of the necessary files or the entire hard drive, if necessary. The functions provided by Windows are complete and independent, and are aimed at ensuring that you do not need to use third-party services or programs.
- Copying data manually... You can always use the old proven method of creating a backup copy of data - manually copying data to an external storage medium. This is a long time, but if you are working with a small amount of data, this solution may be quite acceptable for you.
- Online services... Recently, the most modern way of backing up data is gaining more and more popularity - these are numerous online services. Companies that provide backups of your files straight to the Internet. A small background application installed on the computer creates copies of the necessary data and stores it on a remote server. However, the volumes provided by such companies for storing your files in the free version do not allow using them as an integrated solution. Often the space offered for backing up data does not exceed 10 GB, so there is no need to talk about creating a backup copy of the entire hard disk. Such services are more likely aimed at backing up a separate number of files.
- Disk imaging... It is the most complete data backup solution for advanced users. This method involves the use of a third-party program to create an image of the entire disk, which can be deployed, if necessary, on another storage medium. With the help of this solution, you can in a short period of time get access to all the data that was on the disk at the time of its backup: documents, programs and media files.
SmartBuy flash drive models for 64gb, 32gb, 16gb, 8gb, 4gb, 2 gb:
- Glossy;
- Crown;
- V-Cut;
- Lara;
- Cobra;
- Quartz;
- Click;
- Hatch;
- Comet;
- Paean;
- Crown;
At the moment, the most popular digital information storage devices are USB sticks and microSD memory cards. Almost any material thing, a flash drive, unfortunately, is no exception, tends to deteriorate and lose in performance over time, which leads to loss or damage to the data on it. In this article, we will look at programs and standard tools of the Windows 7 and 10 operating system for recovering flash drives and memory cards as such, as well as data stored on them.
Recovering the file system of a RAW flash drive
A flash drive that needs to recover from RAW format is one of the most common problems regarding the file system on a flash drive. You will learn how to restore the file system of a flash drive by reading the guide below. Consider the sequence of actions:
- Open the Start menu and start typing the phrase "create and". Click once with the left mouse button on the icon of the system utility "Create and format hard disk partitions" that appears.
- In the opened window of the "Disk Management" program, find the disk, the amount of memory of which corresponds to the memory of the drive you want to restore. The system will show the data on it as not distributed. In our case, this is a device named "Disk 1".

- Right-click on the crossed out space and select the "Create simple volume" option in the drop-down list.

- You will be greeted by the "Simple Volume Wizard". Click on the Next> button.

- In the next window, you will be prompted to specify the size of the volume. To use all available storage space, the number in the "Simple Volume Size (MB)" item must match the number of megabytes in the "Maximum Size (MB)" line. Click Next>.

- In the next window, you can assign a drive letter A - Z. After selecting, click Next> again.

- In this window, leave everything unchanged, except for the "Volume label" parameter. Here you can specify the name that the flash drive will receive after formatting. The easiest way is to follow this principle: the name of the manufacturer's company and the volume of the device. If you had to restore a 16 GB flash drive from Kingston, then you should call it "Kingston 16 GB".

- The last window will show the parameters set for the new volume. Click Finish.

Ready. Now you can open the data on the drive using the built-in "Explorer". In Disk Management, the device will be highlighted in blue to indicate that it is working properly. 
How to recover a formatted USB flash drive
The recovery process for a USB flash drive depends on how it was formatted. If it was a quick cleanup, then it will be easy to get the files back to the drive. Deep cleaning involves removing information more thoroughly, which leads to difficulties in recovery. Also, the instruction below is suitable for users who are interested in how to recover a damaged USB flash drive and how to recover a USB flash drive without formatting. Let's take a closer look:
- Download and install the Ontrack EasyRecovery Proffesional 12 software.
- In the main window, select the “Everything” option and click Next.

- Click on the drive you want to recover, then Scan.

- The program will start scanning. The waiting time will depend on the storage capacity of the drive.

- After completing the check, the application will display a window with a summary of the information found.

- Select the files you want to recover and click Recover.

- Click the Browse button.

- In the Windows System Explorer window, select a location to save the file. Important: you cannot immediately save files to the device from which they were restored.

- Click on the Start Saving button.

Ready. The files have now been restored and are ready for further work.
How to recover microSD
Bringing the microSD card to working condition is identical to the same process for a flash drive, only you have to use a special program designed to work with MicroSD devices. Below are the instructions for recovering a microSD drive in SD Card Formatter:

The microSD drive is now ready for use.
Recovering data from microSD memory card
Since memory cards are essentially the same flash drives, but designed to work in mobile devices - tablets, mobile phones, DVRs, and so on, data recovery from them can be done using the same tools that are used for flash drives. One such free application is Disk Drill. Consider how it works:
- Download the latest version of Disk Drill from the official website and install it.
- After launching the program, find your memory card and click on the Recover button opposite it.

- Disk Drill will start searching for deleted files on the drive, so you will need to wait for a while until it finishes.

- When finished, Disk Drill will display all found files sorted by folders with their data type: audio, photos, documents, and more. Check the boxes and click Recover. By default, recovered files will be saved to the "My Documents" directory. To change the path, click on the open folder next to the Recover button.

- Disk Drill will display a window with information about the weight of the saved documents and their number.

Now you can use your newly acquired files.
Recovering SanDisk Flash Drives
SanDisk has never released an official program to fix its flash devices. But if you need to recover a sandisk flash drive, there are many tools on the Internet for this, one of which, the HP USB Disk Storage Format Tool, will be discussed below. The sequence of actions will be as follows:

Recovering Data from SanDisk Flash Drives
We will try to return data from SanDisk flash drives using R.saver. Consider the sequence of actions:

After completing the process, you can use the recovered data.
Recovering information from flash drives Transcend
Almost all well-known manufacturers of flash drives have the same situation with the availability of special software for working with them - unfortunately, it is absent. Fortunately, there are many third-party programs that work equally well with all devices from any manufacturer. In this guide, we will answer the question of how to restore a Transcend flash drive using the Recuva program from Piriform, the creators of CCleaner. Consider her work:
- Download the Recuva app from the developer's official website.
- At the top of the window, select your USB flash drive and click "Scan".

- After these actions, a progress indicator will appear on the screen and the approximate waiting time before the disk scan is completed.

- From the list of files that appears, select the ones you need and click Recover.

- In the Windows system "Explorer", specify the location on the disk where you want to save the data.

- The program will display a window with information about the saved documents. Click OK.

Now you can continue to use the data that is important to you.
Formatting Transcend Flash Drives
To bring the flash drive into working condition, in most cases, one formatting of the data storage will be enough. To do this, in the guide below, we will use the free software "AOMEI Partition Assistant Standard". The sequence of actions will be as follows:
- After installing and launching AOMEI Partition Assistant Standard, select your flash drive in the program window, and on the left side of the interface, find and click on the "Format partition" operation.

- In the window that appears, you can change the name of the flash drive. To do this, enter any other name in the "Section label" field. Click OK to prepare the data store for formatting.

- In the upper left corner select "Apply".

- The pending operations window contains a description of what changes or tools will be applied to the device. Click the Go button to continue.

- In the next box, select Yes.

- Now AOMEI Partition Assistant will start formatting the USB stick. Wait a while.

- Upon completion of work with your device, the application will display a window in which it will be said that the formatting was successful. Click OK.

Now you can continue working with the flash drive.
Recover microSD card on Android phone
Due to the constant development of mobile operating systems, in some situations they are not inferior in capabilities to their desktop counterparts. Since almost every phone or tablet has a microSD card slot, it would be strange not to find built-in system tools for working with it. The material below will tell you how to format a memory card using only one mobile phone on Android. Consider the sequence of actions:
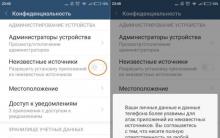
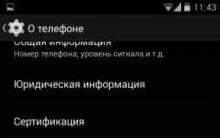
- Open the settings menu on your device.
- Find an item called "Memory" or something like that. Go to it.

- Select the "Erase SD Card" option.

- The utility for cleaning and formatting the removable storage will open. Click on the red button Clear and format.

- The card will be cleared. Do not remove it during formatting and wait for it to complete.

- Now your device is ready for use, and the utility will no doubt inform you about it. Click on the Finish button.

Now you can continue to use your smartphone as if nothing had happened.
Conclusion
In our information age, there is a need to store digital information. For this, USB sticks and microSD memory cards are used. But over time, like any thing, they can deteriorate, which leads to the loss of information stored on them. This article describes how to recover such drives and the data on them.
Related Videos


1440x900 aspect ratio
Monitor screen resolutions
When do I need to update the firmware
How to turn an Android smartphone into a security camera
What does a Chinese keyboard look like (history and photos)