The operating systems of Microsoft and Apple occupy the leading places in terms of distribution in the world. At the same time, the share of Windows is 82.5%, and macOS - 12.5%. With this ratio, there is nothing surprising in the fact that corporate software is developed mainly for Microsoft products. As an example, we can take the 1C Enterprise platform, which does not have a desktop version for macOS. Installing Windows on Mac as a second OS helps to solve this problem.
The tasks that require the use of a second operating system on a MacBook are different. Depending on which programs you intend to use, you can choose one of the available options:
- installing the OS on a dedicated hard disk partition using the built-in Bootcamp utility. In this case, the user, having booted into Windows, can fully use all the hardware resources of the laptop. Suitable for work with resource-intensive applications;
- use of virtualization technologies. Parallels Desktop offers the most convenient option. Using the Coherence mode, Windows programs can be used without rebooting right in the macOS environment. In full screen mode, the user can switch between the two operating systems as between different desktops. Hardware resources in this case are limited by the user independently.
Consider how to install and use Windows in both versions.
Boot Camp Assistant
Users who have had to install two operating systems know that Windows does not tolerate "competitors" by overwriting their boot sector. Even two different operating systems from Microsoft do not get along well with each other, fighting for boot priority. Apple solved this problem in an original way by introducing the Boot Camp utility into the system. It comes standard with both iMac and MacBook Air, Rro and Retina 12-inch models.
- Before we start installing Windows, let's check that our Mac meets the hardware requirements. Click on the apple logo in the menu bar and open the information about the computer. We look at the model and year of manufacture indicated in the screenshot.

- We go to the technical support page. For example, let's check the possibility of installing Windows 10.

- Open the list and check the match. Our model falls into the group marked in the screenshot as “later”, released in 2016.

- We launch Finder, find the "Utilities" folder in the programs and open it. The Boot Camp Assistant we need is marked with a box. Before you run it, make sure that the system is updated to the latest build of High Sierra and the latest versions of other Apple software are installed. For the correct operation of the utility, this is a necessary condition.

- The first window is informational. Make sure your MacBook is connected to the mains following the instructions.

- We indicate the location of the ISO file with the Windows distribution received from the Microsoft website. By clicking on the point indicated by the arrow between the partitions of the hard disk, we set the desired size. After completing the preparation, click the "Install" button.

- The system automatically loads the necessary hardware drivers. Some MacBooks may require a flash drive to store support software. For older Pro models equipped with a DVD drive, the distribution ISO file must be burned to a disc. Installing Windows on them from a clean image is not supported and you cannot do without external media.

- After completing the preparations, macOS will ask you for confirmation to partition your hard drive.

- The computer will restart and run the standard Windows installer. Further actions are no different from installing this OS on a regular PC. The last step is to activate the Boot Camp wizard. All the drivers necessary for the operation of the second system are contained in one package that was loaded before partitioning the disk. As a result of the operations performed on the MacBook, a BootCamp partition was created, on which Windows will “live”.

Switching between the two operating systems is done by rebooting while holding down the Option ⌥ key. At startup, the computer will display a selection menu. By moving the pointer in the form of an arrow, we select the system that we will use.

If you have gotten used to gesture control in macOS, it's time to think about the mouse. It is impossible to work without it on a MacBook in Windows. With all the tricks of Microsoft, the system does not support even a fifth of the trackpad's capabilities.

Removing the BootCamp Partition
When the need to use a second operating system is no longer necessary, the BootCamp partition, along with Windows, can be deleted. The operation is fast and does not require a reboot.
Mac OS Extended
The file system used by Apple prior to macOS High Sierra is called HFS+ or Mac OS Extended. If your Mac is using a regular hard drive, it hasn't changed since the update.
- Launch Boot Camp Assistant and skip the first information window. At the stage of selecting actions, we check that the checkmark is only in the place marked with an arrow. Click "Continue".

- The system shows the new disk partitioning scheme. As you can see, the BootCamp section is no longer on it. Click on the "Restore" button.

- We confirm our desire to change the partition scheme by entering a password.

- The operation is accompanied by the appearance of a bar with a progress indicator. After a few minutes, you will see the following window.

The disk again consists of one partition and there are no traces of the presence of Windows on it.
APFS
After upgrading to macOS High Sierra on Macs using SSD storage, the file system changes to AFPS. This FS is better optimized for SSDs and is the default on all new Apple computers. However, if you try to delete the Windows partition in the way described above, the user will receive an error. The system will refer to the impossibility of performing the operation, since the boot volume is formatted in a file system other than HFS+.
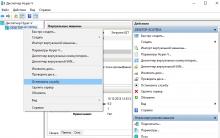
- Open the Boot Camp neighbor in the Utilities folder.

- In the navigation pane, select the volume that hosts Windows. Press the "Delete" button marked with an arrow.

- We confirm the choice made.

- After successful completion of the operation, close the informational message.

- Press the button marked with a checkmark. Using the “-” sign indicated by the arrow, delete the extra BootCamp and “*” sections.

- The disk layout should take the following form. Click the "Apply" button.

- As you can see in the screenshot, the operation was completed successfully. We managed to remove the Windows partition and return the SSD to its original state.
Parallels Desktop is the best virtualization solution for macOS. With it, you can install any version of Windows or Linux and use the necessary software that only works on these operating systems.
- Since we have already downloaded the ISO image for installation on Boot Camp, we select the marked item in the wizard.

- Specify the distribution location manually or let the program find it automatically.

- Enter the existing Windows digital license key.

- By default, the application offers us optimization for using office programs.

- At this stage, put a tick in the area indicated by the arrow to manually set the parameters of the virtual machine.

- Here we can configure the allocation of disk space, memory, use of network resources and peripherals. The specified parameters must not be lower than the minimum requirements for a PC by Microsoft. For example, for RAM this value is 2 GB. After the preliminary setup is completed, the Windows OS installer will start.

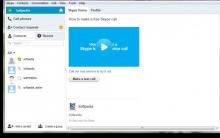
- After completing the necessary installation steps, you get a second operating system on your Mac in the form of a virtual machine. The buttons marked in the left corner of the window are responsible for the operating mode. The green one expands Windows to full screen mode and it will look like a regular desktop, taking up a separate workspace. Blue activates full compatibility mode. It lets you open Windows applications directly on your Mac desktop.

- If you no longer need to use a VM, you can easily remove it from the Parallels Control Center by selecting the appropriate item from the context menu.

- Files can be left for later use or completely deleted in the trash.

Using the built-in snapshot function, you can test any software on a VM without worrying about the integrity of the system. You can return it to its original state in several movements.
Finally
As you can see, installing Windows on a MacBook as a second system is an easy task. The choice of use case depends only on the needs of the software for hardware resources.
Video instruction
The videos below will help you better understand the intricacies of installing and using Windows OC on Mac computers.
This post was not written for the sake of holivar, but simply to share experience. I'll answer the bulk of your questions right away:
- Why is it necessary?
- It's just necessary!
- There is MacOS, why on Mac Windows?
- Everyone chooses for himself what it is more convenient for him to work with! I like Apple hardware, but I'm used to working in Windows!
- Are there virtual machines?
- They work slowly!
- Is there Bootcamp!?
- There is little space on Air, and only Windows takes about 30-40GB, with all the software!
Did you answer all questions? If you're still wondering how to pull this off, then welcome to the post...
If you have an external CD drive, this post may not be for you, here I will show you how to install Windows on a MacBook Air without a drive.
In order to do all this, we need:
- 2 USB flash drives (one for Windows 7 (from 4 GB), the other for drivers (from 1 GB))
- 1 PC - with Windows 7
- Internet
- and of course the brand new Macbook Air 2010 Late
Stage 1. Prepare a bootable flash drive with Windows 7
First, let's prepare the flash drive and make it bootable. To do this, we need a PC with Windows 7 and a disk from Windows (preferably x64, since the laptop supports x64).Now we have a USB flash drive formatted in FAT32, which is active, i.e. may become bootable.
In order to install the bootloader, you need to do this in CMD:
- F: (my CD-ROM is marked with the letter F:, yours may be different)
- cd \boot\
- bootsect /nt60 E: (where E: is the flash drive name)
Step 3: Make Macbook see USB Flash with Windows
All my attempts to get the Macbook to see the bootable flash drive failed, so I had to use Google.It turns out I'm not the only one who needs pure Windows/Linux on a Macbook, and there's a program for that rEFIt.
Download it from the official site:. I installed the latest version 0.14 for myself. It is installed as standard, like any application in MacOS.
After installation, you need to restart your computer 2 times. On the second reboot, you need to hold down the right-option and a similar menu will appear (USB Flash with Windows should be in the MacBook):

You will have a macOS icon and a Windows icon by default. We need to choose Windows.
After launching the installer, entering the key, select "full installation".
A list of partitions into which the SSD is partitioned will be displayed:

Delete all sections! And we create new ones, when creating Windows, it will offer, or rather order, to create a 100MB system partition.
I partitioned the disk into 100MB (), 40GB (system), and the rest.
As everything is installed, the computer will reboot and Windows will start, at the beginning, it will probably hang on a white screen for a long time, and look for the MacOS partition, this will be cured after installation by the driver, and the Bootcamp application in Windows, in order to quickly find the desired partition, hold down the left option and selects the Windows drive.
After the installation is completed, install the drivers from the second flash drive, reboot. After the reboot, go to Bootcamp, select the disk to boot Windows and click restart now. ALL! Now you won't see the Macbook turn on white screen for about a minute.
A little about how it all works
After working for 2 days on a brand new MacBook, I appreciated all the advantages of an SSD. Windows loads 10-15 seconds (from pressing the power button until all the icons in the system are loaded)Word opens in 1 second
Photoshop CS5 - the first time in 4 seconds, if you turn it off and on again for 2 seconds (most likely due to ReadyBoost, and all sorts of new features in Windows 7)
Application response time is instant.
And all this with a combination of Core2Duo, DDR3, Multi-touchpad, 1440x900…
In a word, I am very satisfied! And it doesn't matter what Windows or MacOS costs, because the MacBook Air 2010 Late is a great piece of hardware!
Happy New Year everyone and good gifts!#MacBook_Pro_13_(середина_2009_года) #MacBook_Pro_13_(середина_2010_года) #MacBook_Pro_15_(середина_2009_года) #MacBook_Pro_15_(середина_2010_года) #MacBook_Pro_13_(начало_2011_года) #MacBook_Pro_15_(начало_2011_года) #MacBook_Pro_13_(конец_2011_года) #MacBook_Pro_15_(конец_2011_года)
Apple introduces artificial restrictions on the ability to install on . In other words, you can't install Windows 10 on older MacBooks and iMacs. But we know one way.
Probably, for this, Apple has some reasons for prohibiting the installation of Windows 10 on old MacBooks, which, however, do not suit the owners of these devices. Therefore, we decided to tell you how to modify the Boot Camp utility in order to be able to install Windows 10 on or.
Understanding that your MacBook or Aimac does not support Windows 10 is quite simple - when you run the Boot Camp utility, you will not see any mention of Windows 10:
Remember, you perform all the following actions at your own peril and risk! Be careful.
Be sure to make a copy of the utility first boot camp(copy using the context menu).

It should look like in the screenshot:

The name matters, because further commands in the console are calculated for the specified name.
So, open the Terminal and write the command:
sudo nano /Applications/Utilities/Boot Camp Assistant2.app/Contents/Info.plist
In the opened file, we are looking for an entry Win7OnlyModels and erase the content along with the opening and closing tags array.

Also I deleted the entries SupportedNonWin10Models and UEFIOnlyModels.

These steps are enough if you are going to install Windows 10 from a DVD. To save, you need to enter a key combination Ctrl+X and confirm with the key Y.
However, if you already, and even instead of using an optical drive, want to, then additional steps will be required:
First you need to go to the system information and save the model ID and version Boot ROM.

Then, in the already open Terminal, you need to move to the section with the name CFBundleVersions, immediately after it create a section DARequiredROMVersions(if it was not there yet, as in my case) and enter after the tag array model id using tags string.
Then let's move on to the section PreUSBBootSupportedModels, erase the prefix Pre and enter the model ID again.

The identifier must also be written in the sections PreESDRequiredModels and PreUEFIModels.
To save, you need to enter a key combination Ctrl+X and confirm with the key Y.
After all the manipulations done, when you start Boot Camp Assistant2, you will see the following window:

It should be noted that the first time you reboot, you may see the standard black screen error "No bootable device...". In this case, turn off the Macbook by long pressing the power key, and then turn it on while holding down the Ctrl key to select boot from a USB flash drive.
Since MacBook and iMac 2008, 2009, 2010, 2011 do not officially support the installation of Windows 10, there may not be drivers for this OS. For 2011 devices, the main problem is a sound card driver error (not yet resolved), otherwise everything is fine. Using AirPods via Bluetooth in this case saves. For older models, after installing Windows 10, you may experience more serious problems - be prepared.
On Wednesday, a new version of Microsoft's operating system, Windows 10, became available for free download. According to the head of the company, the "ten" opens a new era in the field of personal computers.
You can install Windows 10 not only on computers with Windows 7 and Windows 8, but also on Mac - using a virtual machine or the Boot Camp system application. In the latter case, the operating system will work without performance degradation, which is typical for virtual machines. The installation process is simple and safe for the data on the computer. After completing the procedure, the user can run OS X or Windows 10 on the computer.
Requirements:
- Mac running OS X 10.9.3 or later.
- 30 GB of free disk space (for creating a partition under Windows 10).
- Windows 10 activation key.
- USB flash drive to store Boot Camp drivers. The minimum size is 16 GB.
Once you've got everything you need, you're ready to install Windows 10 on your Mac. We strongly recommend that you back up your computer data using Time Machine.
How to install Windows 10 on Mac via Boot Camp:
Step 1: On an OS X computer, launch Boot Camp Assistant. The program is located in the Programs –> Utilities folder.
On the first screen, click Continue.
Step 2: On the second screen, if you don't have the latest Boot Camp drivers, check both boxes: Create a Windows 7 installation disc or newer and Download the latest Windows support software from Apple. After you click Continue, the program will prompt you to write a copy of the drivers to a USB flash drive.
Step 3: Insert a flash drive or USB drive and select the Windows 10 ISO file. Boot Camp Assistant will warn you that all data on the drive will be deleted. Click continue.
Step 4 A: The process of downloading drivers to the flash drive may take 10-15 minutes, depending on the speed of your Internet connection.
Step 5: After you download the drivers to your USB flash drive, Boot Camp Assistant will prompt you to create a partition on the disk for Windows. Under the new OS, you must allocate at least 30 GB.
Step 6: After confirmation, restart your Mac. If you did everything correctly, you will see the Windows 10 installation window on the screen. From now on, follow the instructions on the screen.
At the step of selecting a partition for installing Windows 10, select "BOOTCAMP".
The Windows 10 installation process may take some time. Do not interrupt the procedure, restart or turn off your Mac.
Step 7 A: When the Mac restarts a second time, you are ready to install the necessary drivers. Insert the USB flash drive you downloaded the drivers to and run the installer.
Congratulations, you have successfully installed Windows 10 on your Mac! Now you can run either of the two operating systems as you wish.
While restarting your Mac, hold down the Option (Alt) button to bring up the boot OS selection window. On the screen you will see a menu to start OS X and Windows. Select the desired system by clicking on the corresponding icon.
Computers of the well-known Apple company are very multifunctional and have a wide selection of specially designed software. But sometimes it happens that a Mac or iMac user wants to install the Windows operating system that is already so familiar to him. Sometimes OS Windows may be needed to install some programs so that you can play your favorite games, and there is no suitable alternative for Mac.
You can install the OS yourself. This can be done in several ways, for example, through a utility or using a flash drive. Let's take an example of applications from Apple called Bootcamp, Parallels Desktop and Virtual Box.
Preparing and Installing Bootcamp
This option allows you to install an additional OS on Mac and iMac in a separately created partition on your hard drive. Choose which system you can boot into during power-on. The advantage of this utility is that by installing the program through it, all the resources of your PC will be available to Windows, this will allow you to use the performance of your Mac to the maximum. The computer will easily pull the most modern games and perform complex tasks.
Before installing an additional OS, keep in mind that it will take up a lot of space on your hard drive. Make sure it has the required gigabytes. On average, you may need about 30 Gb.
Before you start installing the operating system on your iMac or Mac, check and prepare the Boot camp program. First, make sure it has all Apple updates installed. To do this, you need to do the following:
During the launch of the utility, you will have the opportunity to select the location where OS Windows will be installed. Before starting the software, close all open applications and programs.
After the utility and flash drives for copying information are ready, you can proceed to the first steps:


Once all files have been copied, the iMac will automatically restart. Next, to display the boot manager, press and hold the Alt key. On the Mac, the disk menu will open, mark the partition with the name of the operating system. This will be followed by starting the OS and setting the parameters.

To install Windows 8, you need to proceed in exactly the same way. Only in the window Choice of actions» you should check the boxes next to the items « Download latest software" and " Create a disc to install Windows 7 or newer».
Installing Windows on a Mac, or rather, setting up the program, begins with choosing a language. Choose the right language right away, otherwise you will have to do all the steps again. Having selected all the parameters in this window, click the button Next, which is located in the lower right corner.
To install the Windows operating system on a Mac, carefully follow all the instructions. During the process, do not restart or turn off your computer. You cannot interrupt the procedure in any way.
After your iMac reboots a second time, you can begin installing the necessary drivers. To do this, download them back from the USB flash drive, install and run the installation program.
Installing Windows via Bootcamp using a flash drive
Installation can be carried out either using the operating system disk or via a USB drive. To download a program from a USB flash drive to a Mac, you must first download it. If we are talking about Windows 8, then the version of this system must be in iso format.
This installation option on Mac and iMac is no different from the previous one. Before starting, you should also check bootcamp for updates and save all the necessary data. The following instruction will help you complete the task:

But it happens that when the installation media is a USB flash drive, the utility requires you to insert a disk with the program and refuses to continue the steps of downloading the software on the iMac. In this case, you can download the Daemon Tools Lite iMac driver. With it, we mount the Windows iso image, it will serve as a virtual drive and then Bootcamp will complete the installation process of our OS without any problems.
Installing Windows on Mac and iMac via Parallels Desktop
In addition to Boot Camp, there are several other options for installing an additional operating system. For example, you can use the program Parallels Desktop, which is a Windows installation virtual machine. You will be able to run Windows programs without restarting your PC.
 You can install by following the instructions below:

A feature of Parallels Desktop is the program's high performance. You can download a free trial version or buy Parallels Desktop software from the link below:
Installing Windows with VirtualBox
VirtualBox is one of the popular virtualization programs. With its help, two operating systems will easily work on your PC at once. Installing an additional OS through VirtualBox is quite simple.
To get started, enter the VirtualBox query into the search system, go to the official website and download the program. When the installation is complete, click on the program icon and select "Create". After that, you can start installing Windows.

Sometimes it happens that after installing an additional operating system, iMac has problems with sound or video playback. To solve this problem, you need to install on the Mac all the drivers that were previously saved to an additional storage device (disk or USB flash drive).
After all the steps taken, the installation of Windows on a Mac is completely over. Restart the program and everything will definitely work.
Related videos


Golden Numbers How to sell a beautiful phone number
Cryptocurrency mining: what is it in simple words
Best laptop operating system: Complete review
Programs for downloading music from classmates Download a sad song from the social network classmates
Mobile version of Yandex browser