Now let's complicate the task a bit - let's make an animated Flash banner. Of course, it is not necessary to talk about a full-fledged Flash animation in this case - there are specialized packages for this. But you can also use Illustrator to create a simple, amateur video.
There are no special tools and interface tools, such as a timeline, that are typical for animation development programs, in Adobe Illustrator. But there is one subtlety - layers can be used as frames.
Create a banner with only text.
- Group the symbols with the command Object › Group(Object › Group).
- The next task is to make contour objects out of font characters, otherwise the correct formation of layers will not work. To do this, select a group and select Type › Create outlines(Font › Trace).
- After that open the palette menu Layers(Layers) by clicking on the button in the form of an arrow on the palette (Fig. 8.11).
Rice. 8.11. Layers palette menu
We are interested in the command in this menu Release to Layer (Sequence)(Convert to Layers (Sequentially)) which translates each individual object onto a new layer. Please note that when applying the command, the group must be selected group, not a layer Layer 1.
What the palette should look like Layers(Layers) after execution Release to Layer (Sequence)(Convert to Layers (Sequential)), shown in fig. 8.12.

Rice. 8.12. The Layers palette after Release to Layer (Sequence)
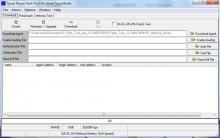
This completes the preparation, you can save using Save for Web(Save for Web) to SWF. SWF is the main graphics format based on Flash technologies. It would be more accurate to say that this is the Flash format (Fig. 8.13).
Probably, today all users are more or less familiar with Flash. It is currently the most common animation format on the Internet and is used to build the vast majority of multimedia web pages.
Of course, even a tenth of the capabilities of Flash are not implemented in Adobe Illustrator, because the program is not designed for this. However, in it you can make either a static picture or a simple animation.

Rice. 8.13. Optimization settings for SWF format
There are the following settings.
- Read Only(Only reading). If you check the box, the file will be written in such a way that it can no longer be opened for editing in any program. This, on the one hand, reduces the size of the files, and on the other hand, protects your copyrights.
- Setting labeled 1. Parameter specifying the type of saving - image or animation.
- If you choose the option AI File to SWF File(Illustrator file to SWF file), the image will be saved as a static image exactly like what you see on the screen when working in Illustrator.
- Layers to SWF Frames(Layers to SWF Frames) allows you to animate existing layers, which will be rendered as frames. We need to choose this option.
- Curve Quality(Quality of curves). Accuracy of curves repeating the curves file of the original image. Decreasing this setting significantly reduces the quality, especially in the area of small details, but reduces the file size. For our case, the optimal value is "7".
- frame rate(Frame delay). Frame rate and, as a result, animation speed. For the effect to be correct, set no more than 4 frames per second.
- loop(Repeat). Play animation multiple times. Suitable for animations where a repeating loop is important. The banner belongs to this type.
Adobe Illustrator and After Effects
Import and simple animation
Hello. Today we are reviewing a simple animation in After Effects.Resources: Adobe Illustrator CC
Adobe After Effects CC
Let's start by drawing in Illustrator.
We draw
1) Draw a yellow Rectangle as a background
Figure 1 - Rectangle
2) Draw a Circle and fill it with a gradient
Let's work on the circle a bit:
- remove the lower point on the contour, we get an arc;
- draw a straight line, closing the bottom of the arc, we get a semicircle
![]()
Figure 2 - 1) draw circle; 2) gradient; 3) delete point
3) Draw a Rectangle and make a copy of it
- one gray rectangle;
- another dark gray rectangle
4) Draw a Triangle from an asterisk by setting the number of rays - 3
![]()
Figure 3 - 1) rect light; 2) rect dark; 3) triangle
5) Draw a cat with Pen and simple shapes ![]()
Figure 4 - 1) head; 2) neck; 3) body; 4) leg; 5) tail
And now the most MAIN moment
Let's distribute the pictures into layers (what will be animated - on a separate layer) like this: ![]()
Figure 5 - all pics (red mark important layers)
Everything, now we save.
Let's see the save settings
![]()
Figure 6 - Save
And now the next stage. CloseAdobe Illustrator and open After Effects.
Import into After Effects
File - Import - File - select our saved file Illustrator.
Let's choose to import layers from Illustrator, if we put footage, we will get an image with merged layers, but we don't need this.
Figure 7 - Import As Composition
All imported.
Now let's see what we have. Double click on composition
, what would open and we would see the layers (if everything was done correctly, there will be several layers). We get this, see picture
![]()
Figure 8 - Open composition
And now what we are here today for - Animation.
Animation in
after effects
Set the pivot point at the arrow at the top of it with the Pan Behind Tool (shortcut - Y). Just take a point and move it where you want. As a result, it will look like this..![]()
Figure 9 - Pan tool and Layers
That's it, now let's move on to layers for animation.
We need an Arrow layer and a Head_cat.
Let's start with arrow.
Expand the list, find and click on the clock. So we put the first point at zero second. In total, the animation will last 2 seconds.
So, these are the settings you need to make (we will put 3 points in total)
| Second | 0 | 1 | 2 |
| +66 | - 70 | +66 |
![]()
Figure 10 - Rotation arrow
Now let's animate the cat's head.
Expand head_cat and find Position.
There will be 4 points.
It will change only the last coordinate without touching the rest.
| Second | 0.1 | 0.17 | 1.12 | 2.0 |
| Position | 689.3 | 729.3 | 729.3 | 689.3 |
![]()
Figure 11 - Position head
So, the principle of animation was like this. The arrow swings from side to side, as soon as it approaches the kitten, he pulls his head into himself, lingers in this position for a bit, and then returns it to its place.
The final stage
Production
You need to create a finished product from your work.
Go to the menu - Add to Render Queue
The Render panel opens and in the Output Module (two clicks) select the output format. I took *.mov
![]()
Figure 12 - Render
Click on the RENDER button and get the result (don't forget to specify the path).
That's all.
The Flash (SWF) file format is based on vector graphics and is intended for scalable, compact graphics for the web. Since this file format is based on vector graphics, the object retains image quality at any resolution and is ideal for creating animation frames. In Illustrator, you can create individual animation frames on layers and then export the image layers as individual frames for use on the website. You can also define symbols in an Illustrator file to reduce the size of the animation. When exported, each symbol is defined only once in the SWF file.
Export command (SWF)
Provides the most control over animation and bit compression.
Provides more control over the mixture of SWF and bitmap formats in a fragmented layout. This command offers fewer image options than the Export (SWF) command, but uses the most recently used Export command options (see ).
Keep the following guidelines in mind when preparing an object for saving as SWF.
With Device Central, you can see how Illustrator artwork will look in Flash Player on various handheld devices.
Inserting an Illustrator graphic
A graphic object created in Illustrator can be quickly, easily and easily copied and pasted into a Flash application.
When you paste an Illustrator graphic into a Flash application, the following attributes are preserved.
Stroke thickness
Definitions of gradients
Text (including OpenType fonts)
Related images
Blend Modes
Contours and shapes
In addition, Illustrator and Flash support the following features when pasting a graphic.
Selecting entire top-level layers in an Illustrator artwork and pasting them into Flash preserves the layers and their properties (visibility and blocking).
Illustrator color formats other than RGB (CMYK, grayscale, and custom formats) are converted by Flash to RGB. RGB colors are inserted in the usual way.
When you import or paste Illustrator artwork, you can use various options to save certain effects (such as text shadow) as Flash filters.
Flash saves Illustrator masks.
Export SWF files from Illustrator
SWF files exported from Illustrator are of the same quality and compression as SWF files exported from Flash.
When you export, you can choose from a variety of predefined styles for optimal output, and specify how you want to use multiple artboards, how symbols, layers, text, and masks are converted. For example, you can choose to export Illustrator symbols as movies or graphics, and create SWF symbols from Illustrator layers.
Importing Illustrator Files into a Flash Application
To create a complete layout in Illustrator and then import it into Flash in one step, you can save your artwork in Illustrator native (AI) format and import it with high fidelity into Flash using the File > Import To Workspace commands. area" or "File" > "Import to Library".
If the Illustrator file contains multiple artboards, select the artboard to import from the Flash Import dialog box and specify the settings for each layer in that artboard. All objects in the selected artboard are imported into Flash as a single layer. When you import another artboard from the same AI file, objects from that artboard are imported into Flash as a new layer.
When you import Illustrator artwork as AI, EPS, or PDF files, Flash retains the same attributes as when you paste Illustrator artwork. Also, if the Illustrator file you are importing contains layers, you can import them using one of the following methods.
Convert Illustrator layers to Flash layers.
Convert Illustrator layers to Flash frames.
Convert all Illustrator layers to one Flash layer.
You have one or two icons that you would like to bring to life with animation. Where would you start? Let's say you have SVG files, Illustrator CC and After Effects CC, but the solution eludes you.
In this article, I'm going to show you how to easily animate an SVG file, including preparing the SVG file in Illustrator and importing it into After Effects CC. I will also explain how you can convert it to Shape Layers and add movement. And finally, let's talk about exporting and rendering.
The end result of the work.
Now let's get down to the most interesting part - learn how to animate images.
Preparing the SVG file in Illustrator
Let's start by opening your SVG file in Adobe Illustrator CC. I'll be animating a small car icon which is available for free on Week Of Icons.
After opening the file, we need to ungroup and separate all objects into layers. You can do it manually or use Release to Layers (Sequence) to speed up the process. Before we import the file into After Effects, we need to save it as an Illustrator file format.
 We can ungroup objects using Release to Layers (Sequence) so as not to waste precious time.
 Importing and organizing a file in After Effects CC
You are now ready to import into After Effects CC. Let's use keyboard shortcut Ctrl+I (Windows) or Command+I (Mac) to load dialog box import file, or go to File > Import > File… In the same place, select the Illustrator CC file we prepared and click import. A small dialog box should appear with the name of the selected file. Select composition from the drop down list called Import Kind.
 A faster way to import a file is to double-click on a column location in the project panel.
 In the Timeline Panel, we will see the new composition. We double click on it. We should now see Illustrator CC layers with orange icons to the left of their names.
Before we get down to business, we need to convert all these layers to shape layers. We need to select them all with Ctrl+A/Command+A, or manually using Shift + Left Mouse. After that right click on the layer and select Create > Create Shapes from Vector Layer.
Now that the new layers are selected, drag them to the top of the panel above the Illustrator CC layers, and then delete the Illustrator CC layers so they don't get in the way.
 Converting Illustrator CC Layers to Shape Layers in After Effects CC
 While not necessary, it is important that we give each layer an appropriate name and/or color. This will allow us to work more efficiently as we focus on keyframes. In the example below, the label colors more or less match the fills of their respective layers.
 Labeling Shape Layers with appropriate names, colors, labels, and positions is very practical.
 Use the keyboard shortcut to configure settings Ctrl+K/Command+K or Composition > Composition Settings… From the Composition Settings, we need to select the Width, Height, Frame Rate, and Duration for the Width, Height, Frame Rate, and Duration. For this project, I chose 60 fps to keep the animation smooth.
At this point, everything seems to be ready to go, but there is one more thing that needs to be done. We need to group certain layers together so that their movements are in sync with the main layer that we can control. This method is called parenting.
 Use Pick Whip to assign a parent layer to multiple layers.
 In our example, I assigned less significant layers (child layers) such as windshield, body parts, wood and ropes to the primary body layer (parent layer). This allowed me to control the position and rotation of the entire car (excluding the wheels) using the parent layer.
Animation creation
I wanted the car to hit a rock and hang in the air for a bit. I also wanted the tree to move up and down and open the trunk. I started by building the stone, the car and the wheels. Then it was time to get over the biggest hurdle - putting the action on the tree. Once that was done, I got to work on the little details like the rack and the ropes.
 Sketch describing the animation
 The first step was to make a rock element or layer, but instead of going back to Illustrator CC to add another layer, I just used the Pen Tool in After Effects CC. This allowed me to quickly design a small stone.
 Oh, mighty Pen Tool!
 The trunk was a relatively simple task. I installed it at the back of the car and made an anchor point at the bottom left vertex. Using Pick Whip , I assigned it to the body's parent layer. The penultimate step was to give the effect of rotation, which in turn made the bouncing moment of the car more realistic. Bodymovin in combination with the Lottie mobile library.
P.S. you can find my Illustrator CC and After Effects CC files.
The icon set is available for free download at .
Transparent GIF in Adobe Illustrator is done as follows. Go to menu File > Save for Web & Devices (Alt+Ctrl+Shift+S). In the window that opens, in the Optimized file format field, you must first go to the tab image size(image size). The fact is that the entire page gets into the optimization window by default, and this is usually not necessary. Therefore, in the Image Size tab, deselect the checkbox Clip to Artboard(Crop to fit page) and click the Apply button.
Then, in the format selection list, select GIF and check the Transparency checkbox.

After that, we will determine which colors will be transparent. All colors present in the image are contained in the tab color table(Color Chart) and are displayed as colored squares. Select a tool from the toolbar on the left side of the window eyedropper(pipette).

Colors can be defined in two ways. The easiest way is to specify the color with an eyedropper directly on the image - after that the color will be highlighted on the color table with a dark stroke. Well, if you know exactly which color should be transparent, you can select it directly on the color table by clicking the corresponding colored box. And in the first and second cases, if you need to select several colors, you need to work with the Shift (or Ctrl) key pressed. After choosing a color, you need to instruct the program to make it transparent. To do this, click on the icon Maps selected colors to Transparent(Add selected colors to transparency). In the figure, this button is circled, and the red color is set to transparent. A transparent area will appear on the image, and the square on the color table will change its appearance - part of it will become a white triangle. To cancel the selected color, you need to select it in the Color Table, and then click the Maps selected colors to Transparent icon again.
A few words about the method of setting transparency. The dropdown menu is responsible for it. Specify Transparency Dither Algorithm, in Russian - Transparency simulation algorithm (fig. below). There are four choices: No Transparency Dither - no algorithm, Diffusion Transparency Dither - diffuse algorithm, Pattern Transparency Dither - pattern-based algorithm and Noise Transparency Dither - noise-based algorithm. In the diffuse algorithm mode, the slider becomes active Amount(Amount) that allows you to change the diffusion value. What to apply in practice? Depending on the purpose and image. I don't use this option and always leave the default - No Transparency Dither.

Press Save - transparent GIF is ready. The work was done in Adobe Illustrator version CS4 (v.14), but all actions and keyboard shortcuts are relevant for the earlier version CS3 (v. 13).


Xbox app Video overview of Xbox features
HSS - circular saw blades made of high speed steels HSS saw blade for metal
COB or SMD: Which type of chip is more efficient for LED downlight?
led matrix smd led matrix
Programs for optimizing material cutting