The privacy and security requirements of a computer are entirely determined by the nature of the data stored on it. It’s one thing if your computer serves as an entertainment station and there’s nothing on it except a few toys and a daddy with photos of your favorite cat, but it’s quite another thing if the hard drive contains data that is a trade secret, potentially of interest to competitors.
The first “line of defense” is the login password, which is requested every time you turn on the computer. 
The next level of protection is access rights at the file system level. A user who does not have permission privileges will receive an error when attempting to access files. 
However, the described methods have one extremely significant drawback. They both work at the operating system level and can be relatively easily bypassed if you have a little time and physical access to the computer (for example, by booting from a USB flash drive you can reset the administrative password or change file permissions). Complete confidence in the security and confidentiality of data can only be obtained if you use the achievements of cryptography and securely use them. Below we will look at two methods of such protection.
The first method considered today will be Microsoft's built-in crypto protection. Encryption, called BitLocker, first appeared in Windows 8. It cannot be used to secure an individual folder or file; only encryption of the entire disk is available. This in particular implies the fact that it is impossible to encrypt the system disk (the system will not be able to boot), and it is also impossible to store important data in system libraries such as “My Documents” (by default they are located on the system partition).
To enable built-in encryption, do the following:
- Open Explorer, right-click on the drive you want to encrypt and select “Enable BitLocker.”

- Check the box “Use a password to unlock the disk”, create and enter a password twice that meets the security requirements (at least 8 characters long, must have lowercase and uppercase letters, it is advisable to enter at least one special character) and click the “Next” button. We will not consider the second unlocking option within the framework of this note since smart card readers are quite rare and are used in organizations that have their own information security service.

- In case you lose your password, the system offers to create a special recovery key. You can attach it to your Microsoft account, save it to a file, or simply print it on a printer. Select one of the methods and after saving the key, click “Next”. This key should be protected from strangers because it, being an insurance against your forgetfulness, can become a “back door” through which your data will leak.

- On the next screen, choose whether to encrypt the entire drive or just the used space. The second point is slower, but more reliable.

- Select an encryption algorithm. If you do not plan to migrate the disk between computers, choose the more robust latest mode, otherwise, compatibility mode.

- After configuring the settings, click the “Start Encryption” button. After some waiting, the data on your drive will be securely encrypted.

- After logging out or rebooting, the protected volume will become inaccessible and a password will be required to open the files.

DiskCryptor
The second cryptographic utility we're looking at today is DiskCryptor, a free and open source solution. To use it, use the following instructions:
- Download the program installer from the official website using the link. Run the downloaded file.
- The installation process is extremely simple; it consists of pressing the “Next” button several times and finally rebooting the computer.


- After rebooting, launch the DiskCryptor program from the program folder or by clicking on the shortcut on the desktop.
- In the window that opens, click on the disk to be encrypted and click the “Encrypt” button.

- The next step is to select an encryption algorithm and decide whether you need to erase all data from the disk before encrypting it (if you do not plan to destroy information, be sure to select “None” in the “Wipe Mode” list).

- Enter the decryption password twice (it is recommended to come up with a complex password so that the “Password Rating” field is at least “High”). Then click "OK".

- After some waiting, the disk will be encrypted. After rebooting or logging out, to access it you will need to launch the utility, click on the “Mount” or “Mount All” button, enter the password and click “OK”.

The undoubted advantage of this utility compared to the BitLocker mechanism is that it can be used on systems released before Windows 8 (even Windows XP, which has been discontinued, is supported). But DiskCryptor also has several significant disadvantages:
- there are no ways to restore access to encrypted information (if you forget your password, you are guaranteed to lose your data);
- Only password unlocking is supported; the use of smart cards or biometric sensors is not possible;
- Perhaps the biggest disadvantage of using DiskCryptor is that an attacker with administrative access to the system will be able to format the disk using standard means. Yes, he will not gain access to the data, but you will also lose it.
To summarize, I can say that if your computer has an OS installed starting with Windows 8, then it is better to use the built-in functionality.
Launch the encryption tool on Windows by searching for "BitLocker" and selecting "Manage BitLocker." In the next window, you can enable encryption by clicking on “Enable BitLocker” next to the hard drive (if an error message appears, read the section “Using BitLocker without a TPM”).
You can now choose whether you want to use a USB flash drive or a password when unlocking an encrypted drive. Regardless of the option you choose, you will need to save or print the recovery key during the setup process. You'll need it if you forget your password or lose your flash drive.
Using BitLocker without TPM
Setting up BitLocker.BitLocker also works without a TPM chip - although this requires some configuration in the Local Group Policy Editor.
If your computer does not have a TPM (Trusted Platform Module) chip, you may need to make some adjustments to enable BitLocker. In the Windows search bar, type "Edit Group Policy" and open the "Local Group Policy Editor" section. Now open in the left column of the editor “Computer Configuration | Administrative Templates | Windows Components | BitLocker Drive Encryption | Operating system disks”, and in the right column, check the entry “Required additional authentication at startup”.
Then, in the middle column, click on the "Edit Policy Setting" link. Check the box next to “Enable” and check the box next to “Allow BitLocker without a compatible TPM” below. After clicking on "Apply" and "OK", you can use BitLocker as described above.
An alternative in the form of VeraCrypt
 To encrypt the system partition or entire hard drive using TrueCrypt's successor, VeraCrypt, select "Create Volume" from the VeraCrypt main menu, and then select "Encrypt the system partition or entire system drive." To encrypt the entire hard drive along with the Windows partition, select “Encrypt the whole drive”, then follow the step-by-step setup instructions. Note: VeraCrypt creates a rescue disk in case you forget your password. So you will need a blank CD.
Once you've encrypted your drive, you'll need to specify PIM (Personal Iterations Multiplier) after your password when you boot up. If you did not install PIM during setup, just press Enter.
System disk encryption is used to prevent unauthorized access to data on the disk. Having encrypted the disk once, you can be calm about the information while traveling with a laptop or during gross interference by law enforcement agencies in the smooth work of the office with the subsequent seizure of computer equipment.
The program is used for encryption Truecrypt version 7.1a. Support for the program has been discontinued, newer versions have reduced functionality, so you only need to use 7.1a, which can be found on torrents. The program is free, there are installations for Windows, Linux, Mac.
Truecrypt encrypts data on the fly, so no preparation is required.
Launch Truecrypt and execute the Encrypt System Partition/Drive command: 
System encryption type - standard: 
Select Encrypt whole drive: 

We indicate that one operating system is installed on the computer: 
Encryption settings: 
The most creative stage is specifying the password for the encrypted disk. And the most difficult one, because... you need to remember this password. The best option is if the password consists of 25 characters (numbers, letters in different cases, service characters). 
The more chaos the better. Encryption key generation: 
Congratulations! Keys created: 
The most tedious step is creating a recovery disk: 
You will need a Truecrypt recovery disk in case of boot sector corruption and to recover your password. The program creates an ISO file that needs to be burned onto a CD/DVD. Using CD/DVD is archaic, but there is no escape, Truecrypt will not let you go until you burn the image to disk. 
If you try to avoid writing a recovery disk, Truecrypt will interrupt the system encryption procedure. The only way out is to write. But you can cheat a little: mount the ISO file created by the Truecrypt program (located in the user's Documents folder by default) onto a virtual drive, for example, using the UltraISO program. 
Successful verification of the recovery disk. If the disc was not recorded, then its image must be saved on another computer (external drive). 
To prevent data from being recovered in laboratory conditions after encryption, select Wipe mode. In this case, the physical clusters of the disk will be overwritten several times and restoring the original state of the disk will become impossible. 
Start of Truecrypt test. The disk is not yet encrypted. It is necessary to ensure that Truecrypt can boot the system and that the user has not forgotten the password. 
You can go get a cup of coffee and enjoy the pleasant moments of reading the user agreement: 
We send the computer to reboot: 
This message will be shown when the system boots. This way you can slightly hide the existence of an encrypted operating system.
There are many reasons to encrypt the data on your hard drive, but the price for data security will be a decrease in system speed. The purpose of this article is to compare performance when working with a disk encrypted with different means.
To make the difference more dramatic, we chose not a super-modern car, but an average one. A regular mechanical hard drive of 500 GB, dual-core AMD at 2.2 GHz, 4 gigs of RAM, 64-bit Windows 7 SP 1. No antiviruses or other programs will be launched during the test, so that nothing could affect the results.
I chose CrystalDiskMark to evaluate performance. As for the encryption tools I tested, I settled on the following list: BitLocker, TrueCrypt, VeraCrypt, CipherShed, Symantec Endpoint Encryption and CyberSafe Top Secret.
BitLocker
This is a standard disk encryption tool built into Microsoft Windows. Many people simply use it without installing third-party programs. Indeed, why, if everything is already in the system? On the one hand, it’s correct. On the other hand, the code is closed, and there is no certainty that it did not contain backdoors for the FBI and other interested parties.
Disk encryption is carried out using the AES algorithm with a key length of 128 or 256 bits. The key can be stored in the Trusted Platform Module, on the computer itself or on a flash drive.
If TPM is used, then when the computer boots, the key can be obtained immediately from it or after authentication. You can log in using the key on the flash drive or by entering the PIN code from the keyboard. Combinations of these methods give many options for limiting access: simply TPM, TPM and USB, TPM and PIN, or all three at once.
BitLocker has two undeniable advantages: firstly, it can be managed through group policies; Secondly, it encrypts volumes, not physical disks. This allows you to encrypt an array of multiple drives, something that some other encryption tools cannot do. BitLocker also supports GUID Partition Table (GPT), which even the most advanced Trucrypt fork VeraCrypt cannot boast of. To encrypt a system GPT disk with it, you will first have to convert it to the MBR format. This is not required with BitLocker.
In general, there is only one drawback - closed source. If you're keeping secrets from people in your household, BitLocker is perfect. If your disk is full of documents of national importance, it is better to find something else.
Is it possible to decrypt BitLocker and TrueCrypt
If you ask Google, it will find an interesting program called Elcomsoft Forensic Disk Decryptor, suitable for decrypting BitLocker, TrueCrypt and PGP drives. As part of this article, I will not test it, but I will share my impressions of another utility from Elcomsoft, namely Advanced EFS Data Recovery. It perfectly decrypted EFS folders, but provided that the user password was not set. If you set the password to even 1234, the program was powerless. In any case, I was unable to decrypt an encrypted EFS folder belonging to a user with password 111. I think the situation will be the same with the Forensic Disk Decryptor product.
TrueCrypt
This is a legendary disk encryption program that was discontinued in 2012. The story that happened to TrueCrypt is still shrouded in darkness, and no one really knows why the developer decided to refuse support for his brainchild.
There are only grains of information that do not allow us to put the puzzle together. Thus, in 2013, fundraising began to conduct an independent audit of TrueCrypt. The reason was information received from Edward Snowden about the deliberate weakening of TrueCrypt encryption tools. Over 60 thousand dollars were collected for the audit. At the beginning of April 2015, the work was completed, but no serious errors, vulnerabilities or other significant flaws in the application architecture were identified.
As soon as the audit was completed, TrueCrypt again found itself at the center of a scandal. ESET specialists published a report that the Russian version of TrueCrypt 7.1a, downloaded from truecrypt.ru, contained malware. Moreover, the site truecrypt.ru itself was used as a command center - commands were sent from it to infected computers. In general, be vigilant and do not download programs from anywhere.
The advantages of TrueCrypt include open source, the reliability of which is now supported by independent audit, and support for dynamic Windows volumes. Disadvantages: the program is no longer being developed, and the developers did not have time to implement UEFI/GPT support. But if the goal is to encrypt one non-system drive, then it doesn’t matter.
Unlike BitLocker, which only supports AES, TrueCrypt also includes Serpent and Twofish. To generate encryption keys, salt and header key, the program allows you to select one of three hash functions: HMAC-RIPEMD-160, HMAC-Whirlpool, HMAC-SHA-512. However, a lot has already been written about TrueCrypt, so we won’t repeat it.
VeraCrypt
The most advanced TrueCrypt clone. It has its own format, although it has the ability to work in TrueCrypt mode, which supports encrypted and virtual disks in the TrueCrypt format. Unlike CipherShed, VeraCrypt can be installed on the same computer at the same time as TrueCrypt.
INFO
Having retired, TrueCrypt left a rich legacy: it has many forks, starting with VeraCrypt, CipherShed and DiskCryptor.TrueCrypt uses 1000 iterations to generate the key that will encrypt the system partition, while VeraCrypt uses 327,661 iterations. For standard (non-system) partitions, VeraCrypt uses 655,331 iterations for the RIPEMD-160 hash function and 500,000 iterations for SHA-2 and Whirlpool. This makes encrypted partitions significantly more resistant to brute force attacks, but also significantly reduces the performance of working with such a partition. How significant we will soon find out.
Among the advantages of VeraCrypt is its open source code, as well as its own and more secure format of virtual and encrypted disks compared to TrueCrypt. The disadvantages are the same as in the case of the progenitor - lack of UEFI/GPT support. It is still impossible to encrypt the system GPT disk, but the developers claim that they are working on this problem and such encryption will soon be available. But they’ve been working on this for two years now (since 2014), and when there will be a release with GPT support and whether there will be one at all is not yet known.
CipherShed
Another TrueCrypt clone. Unlike VeraCrypt, it uses the native TrueCrypt format, so you can expect its performance to be close to that of TrueCrypt.
The advantages and disadvantages are still the same, although you can add to the disadvantages the inability to install TrueCrypt and CipherShed on the same computer. Moreover, if you try to install CipherShed on a machine with TrueCrypt already installed, the installer offers to remove the previous program, but fails to cope with the task.
Symantec Endpoint Encryption
In 2010, Symantec bought the rights to the PGPdisk program. The result was products such as PGP Desktop and, subsequently, Endpoint Encryption. This is what we will consider. The program, of course, is proprietary, the sources are closed, and one license costs 64 euros. But there is support for GPT, but only starting from Windows 8.
In other words, if you need GPT support and want to encrypt the system partition, you will have to choose between two proprietary solutions: BitLocker and Endpoint Encryption. It is unlikely, of course, that a home user will install Endpoint Encryption. The problem is that this requires Symantec Drive Encryption, which requires an agent and a Symantec Endpoint Encryption (SEE) management server to install, and the server also wants to install IIS 6.0. Isn't it a lot of good stuff for one disk encryption program? We went through all this just to measure performance.
Moment of truth
So, let's get to the fun part, namely testing. The first step is to check the performance of the disk without encryption. Our “victim” will be a 28 GB hard drive partition (regular, not SSD), formatted as NTFS.
Open CrystalDiskMark, select the number of passes, the size of the temporary file (we will use 1 GB in all tests) and the disk itself. It is worth noting that the number of passes has virtually no effect on the results. The first screenshot shows the results of measuring disk performance without encryption with the number of passes 5, the second - with the number of passes 3. As you can see, the results are almost identical, so we’ll focus on three passes.


CrystalDiskMark results should be interpreted as follows:
- Seq Q32T1 - sequential write / sequential read test, number of queues - 32, threads - 1;
- 4K Q32T1 - random write / random read test (block size 4 KB, number of queues - 32, threads - 1);
- Seq - sequential write/sequential read test;
- 4K - random write / random read test (block size 4 KB);
Let's start with BitLocker. It took 19 minutes to encrypt a 28 GB partition.
Continuation is available only to subscribers
Option 1. Subscribe to Hacker to read all materials on the site
Subscription will allow you to read ALL paid materials on the site within the specified period. We accept payments by bank cards, electronic money and transfers from mobile operator accounts.
Or: how to encrypt data?
I warn you right away:
It’s better to think 100 times before encrypting the system drive (perhaps it will be enough for you to encrypt a non-system drive and store all the data on it). If the system disk is damaged, the ability to extract data from it is not great (you can connect it to another computer, install TrueCrypt and mount it in the system via TrueCrypt. Then extract the data). For me, first of all, it is important that no one gains access to my computer in any way. For example, by storing data on another drive, you can still access history logs that are still stored on the C:\ drive.
If losing information is less critical for you than having this information fall into other hands, then this article is for you.
1. Let's assume that you managed to install the program and, like me, were able to install the Russian interface yourself (download this file, unpack it, put it in the folder with the installed program).
The TrueCrypt program looks like this:

It can be seen that there are no encrypted disks; the system disk is not yet encrypted.
2. We are interested in the “System” / “encrypt system partition/disk” menu in TrueCrypt:

3. By launching “System” / “encrypt system partition/disk” in TrueCrypt, the wizard starts. I chose “Normal”, although you can choose “Hidden” (by clicking “More details” you can read)

4. Select the encryption area. I selected "Encrypt Windows system partition":

5. Message window. I press “Yes”:

6. Encryption of the protected area. Check “Yes” and click “Next”:

8. Search for hidden sectors. On a physical machine it takes 1-2 minutes. I used a virtual machine to write this article. I couldn’t wait for the process to end. I had to reboot the computer using the Reset button. In this case, I repeated all the steps, but a step before this point a window appeared with a message that the check had already been performed, and suggested using the information received from the last check. I agreed :) I hope everything goes well for you. In general, you can skip the check.

8. I have one operating system: Windows 7 x64. I checked the top box:

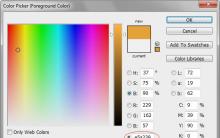
9. Password with which you will encrypt the disk (I recommend using Latin letters).
You can (if you know what it is and how to use it) use “Key Files,” but it’s easier and faster to encrypt it with a password.


11. Keys generated:

12. Create a recovery disk, save in the specified path. ISO image of the recovery disk.

13. You need a blank CD. Insert it into the CD drive and click “OK”:

14. Record a blank. To be honest, I am currently typing this manual using a virtual machine. I did not record the blank, but simply mounted the disk image into a virtual CD-ROM. But I recommend that you burn a physical CD.

15. Let's assume you have figured out the disk. Further…
16. Choose HOW we will encrypt the disk. I chose the fastest way - without cleaning. Cleaning it up will take a long time, but it will be impossible to read the data from such a disk. The point of cleaning is that the free space on the disk is filled with random “garbage” many times in a row. (if interested, read the help).

The secure wipe function may seem unnecessary, but if you do not want any traces left on your hard drive and want to work only with encrypted data, then it is necessary. This procedure effectively removes existing file fragments that may remain on the hard drive from previous installations. Choose to erase unused areas in 3, 7 or even 35 cycles and they will be systematically overwritten.
17. Pre-test of system encryption.

18. Click “Yes”:

19. Read the comments:

IMPORTANT NOTES - PLEASE READ OR PRINT (click ‘Print’):
No files will be encrypted until you successfully restart your PC and start Windows. Therefore, if any failure occurs, nothing will happen to your data. However, if something goes wrong, you may have difficulty starting Windows. So read (and, if possible, print) the following tips on what to do if Windows refuses to start after you restart your PC.
What to do if Windows does not boot ————————————————
NOTE: These instructions only apply if you have not started encryption.
— If you enter the correct password and Windows doesn't boot (or if TrueCrypt keeps telling you that the password is incorrect when you enter the correct password), don't panic. Reboot (turn off and on) your computer and when the TrueCrypt bootloader screen appears, press the Esc key on your keyboard (and if you have multiple OSes, select the one you want to launch). Windows should then start (assuming it is not encrypted) and TrueCrypt will automatically ask if you want to remove the pre-boot authorization feature. Please note that the previous steps DO NOT work if the system partition/disk is encrypted (no one can start Windows or access encrypted data without the correct password, even if they complete the previous steps).
— If the above does not help or if the TrueCrypt bootloader screen does not appear (before Windows starts), insert the TrueCrypt Rescue Disk into the CD/DVD drive and restart the PC. If the TrueCrypt boot loader screen does not appear (or if you do not see the 'Repair Options' option in the 'Keyboard Controls' group on the TrueCrypt boot loader screen), your PC's BIOS may be set to boot from the hard drive first and then from the CD/DVD. If so, restart your PC, press F2 or Delete (as soon as you see the BIOS initial screen) and wait until the BIOS settings screen appears. If this screen does not appear, restart your PC again (press the Reset button), immediately starting to frequently press the F2 or Delete keys. In the BIOS settings screen that appears, configure your PC to boot from the CD/DVD first (see your motherboard/BIOS documentation for how to do this). Restart your computer again. The TrueCrypt Recovery Disk screen should now appear. From this screen, select ‘Repair Options’ by pressing F8 on your keyboard. From the 'Repair Options' menu, select 'Restore original system loader'. After this, remove the recovery disc from the CD/DVD drive and restart your PC. Windows should now start normally (assuming it is not encrypted).
Please note that the previous steps do NOT work if the system partition/disk is encrypted (no one can start Windows or access encrypted data without entering the correct password, even if they complete the previous steps).
Also keep in mind that if you lose your TrueCrypt recovery disk and your enemy finds it, he will NOT be able to use it to decrypt the system partition or drive unless he knows the correct password.
20. You need to restart your computer:

21. My virtual machine is visible :)
You will have a similar window when you boot your machine.

22. Enter the password:

23. We are waiting for the operating system to boot again.
The last window 9 please note - in English). After clicking the Encrypt button, the encryption process itself will begin:

On a physical SATA machine, a 300GB disk is encrypted for about 10 hours. In this case, the system is working, you can watch movies, work on the Internet. The only drawback is that the disk system slows down quite noticeably (of course!).

25. Let's assume that you have waited for the disk encryption to finish and rebooted your computer. Enter password:

26. With the system booted, launch TrueCrypt. Please note that it has become “Russian” again, and an encrypted system disk has appeared in the disks:

27. Go to the TrueCrypt menu / “System” / “Settings”. Enter what is written in my screenshot:

28. Reboot again. Notice how the boot menu has changed:

Actually I have it written No System Drive(subtle sysadmin humor).
You can buy a 1-2TB hard drive for torents. work quietly, distribute torrents. Of course, encryption/decryption affects system performance. But in general, it is almost unnoticeable.
You can install Ubuntu on a second, separate physical disk of 160 GB, easily work on the Internet on it, and enjoy a convenient and beautiful interface.
The boot order of disks in the BIOS can be set:
2. Windows (encrypted)
If you press F8 (boot selection menu) during boot, you can boot from Windows. Anyone who doesn’t know that you have an encrypted system will almost 100% succeed in the proposed scam.
If you wish, you can tell us your way of hiding data from the curious.
There are no similar posts...


Call forwarding service
Daemon Tools Lite Virtual drive for disk images
Solar battery for charging your phone
Castration of protected Sanyo and Panasonic batteries and a small educational program on Li-ion
What apps should you download before traveling to Spain?