you can guarantee only if its version is 4.0 and higher. If The Bat version! 3.99.29 or lower, then use it is unsafe. We recommend installing the email client of a newer version.
Configure iMAP protocol
To set up the mail program The Bat! According to the IMAP protocol:
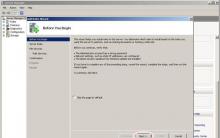
4. On this page, enter the following data:

6. On the settings page that opens, specify the following data:
- To access the server, use the IMAP protocol;
- Server for mailing - imap.mail.ru;

8. In this section, specify the following data:
- User - the full name of your mailbox in format [email protected];
- Password - acting password from your mailbox.

10. For better data protection that you send and get using the mail program, you can enable encryption. To do this, in the window that appears, check the box opposite "Yes" after the question "Do you want to check the other properties of the mailbox?" And click "Finish."
11. On the left menu, select "Transport", and in the "Sending mail" and "Mail" sections in the "Connection:" drop-down lists, select "Safe to Spec.port (TLS)";

Check that the iMAP server port is specified 993, and the SMTP server port is 465.
12. Press "Authentication ..." opposite the "SMTP server", check the box next to the "SMTP authentication", check the "Use mail receipt parameters" (POP3 / IMAP) "item, and also remove the checkbox in front of the" POP authentication before SMTP " "Click OK.

13. In order for the folder list in the mail program is similar to the folder list in your drawer, right-click on the name of the created account and select "Update Folder Tree."

14. Now you need to specify the folders in which all sent from the mail program will be saved, as well as letters from other system folders of the postal program. To do this, right-click on the name of the newly created account and select "Mailbox properties ...".

15. In the window that appears, go to the "Mail Management" section, set the checkboxes opposite the "sent" and "basket", in the drop-down lists, select "Sent" and "Basket", respectively.

16. Go to "Delete" subsection and set the ticks opposite "Put in the specified folder" in the "Normal Delete" and "Alternative Delete" sections by clicking the "Overview" button, select the "Basket" folder in the proposed lists.

17. Remove the tick "Use alternative removal for old letters", and opposite "Mark remote letters as read" set.
18. Click OK - the mail program is configured!
Set up the POP3 protocol
To set up the postal program The Bat! according to ROR3 protocol, it is necessary:
1. In the top panel in the "Box" menu, select "New Mailbox ...";
2. In the "Drawer Name" field, enter any name, for example: Mail.ru mail.
Click "Next".
3. On this page, enter the following data:
- "Your full name" - enter the name that will be displayed in the "From:" field for all sent messages;
- "E-mail address" - Enter the full name of your mailbox.
4. On the settings page that opens, specify the following data:
- For access to the server, use the protocol - POP3;
- Server for mailing - pop.mail.ru;
- SMTP server address - smtp.mail.ru.
Tick \u200b\u200bthe checkbox "My SMTP server requires authentication".

6. In the window that opens, specify the following data:
- User - the full name of your mailbox in the format [email protected];
- Password - acting password from your mailbox.
7. Mark the checkbox "Leave emails on the server" if you want to leave letters downloaded by the postal program in the mailbox on the server.

9. For better data protection that you send and get using the mail program, you can enable encryption. To do this, in the window that appears, check the box opposite "Yes" after the question "Do you want to check the other properties of the mailbox?" And click "Finish."
10. From the menu on the left, select "Transport", and in the "Sending Mail" and "Getting Mail" sections in the "Connection:" drop-down lists, select "Safe to Spec.port (TLS)".

Check that the POP3 server port is specified 995, and the SMTP server port is 465.
11. Click "Authentication ..." opposite the "SMTP server", check the box next to "SMTP authentication" and check the "Use mail receipt parameters" (POP3 / IMAP) "item, click OK. Setting up the mail program is completed!

Change the SSL protocol settings
Safety of work in the programThe Bat! You can guarantee only if its version is 4.0 and higher. If The Bat version!3.99.29 or lower , I use it unsafe. We recommend installing the email client of a newer version.
To configure your email program TheBat! on SSL secure protocol:

4. If your mail program is configured by the IMAP protocol.
In the "Sending Mail" sections in the "Connection:" drop-down list, select "Secure to Spec.port (TLS)".

Check that the SMTP server port is specified 465.
If the settings mentioned above are already installed in your postal program, you do not need any changes.
Error "Greeting TLS is not completed. Server Name ("smtp.mail.ru.") does not match the certificate "or other error with reference to the inability to complete the connection using TLS.
Perhaps the root certificate base of The Bat! The required to work with the mailbox on the secure SSL protocol is not relevant, in this case you need to use Microsoft Cryptoapi, for this you need:

Note also that for correct operation of the SSL protocol, the correct data and time are installed on your computer. You can check the date and time, as well as reinstall them using our instructions.
send us
Error "Unable to connect to the server" or "The greeting TLS is not completed. Server name ("217.xx.xxx.xxx") does not comply with the certificate "
Please check your email client settings:
Perform all the actions described above and repeat the sending of the letter. If the problem persists, please send us a log of sending your mail client to diagnose the problem.
To get a shipment log:
If you have any problems with setting up the mail program, use our
Step number 1. Run the program "The Bat!"In the top control menu, select item "Box (Account)"then click on item "New mailbox (new ...)"
Step number 2. In the window that opens, enter the name of the mailbox, for example, the address of the mailbox or your name. Press the button "Next (Next)."

Step number 3. At the next stage, enter your name, address of your mailbox and organization name. The name you enter at this stage will stand in the headlines of your outgoing letters. Field "Organization (Organization)" You can leave empty. Press the button "Next (Next)."

Step number 4. In this window, select the most suitable protocol of work with Mail:
- IMAP - all mail is stored on the server. Select IMAP if you are planning to work with mail from multiple devices and via a web interface.
- POP3 - Mail is downloaded from the mail server. Select POP3 if the mail is planned only from one device.
As a server for incoming and outgoing mail, specify mail.Syt..
Select Encryption type TLS / SSL..
Tick \u200b\u200bitem "My SMTP server requires authorization."
Press the button "Next (next)".


Step number 6. In the case of the correct entry of all data, you fall on the final process screen "Creating a new mailbox (CREATE NEW UPER ACCOUNT)". You are invited to check the other properties of the mailbox. Choose "Yes" and click "Ready".

Step number 7. In the window of the mailbox properties window that opens, go to the "Transport" section.In case your Internet provider blocks any ports in the tab "Transport" You can use alternative.
The following ports are available for connecting to the post server:
- IMAP: SSL encrypted connection - 993, without encryption - 143
- SMTP: encrypted SSL - 465 connection, without encryption - 587
- POP3: SSL encrypted connection - 995, without encryption - 110

Step number 8. In the window that opens, select "SMTP Authentication (RFC-2554)" and "Use mail receipt parameters (POP3 / IMAP)". To apply the changes, click "OK".

Congratulations! Your mail is configured.
In this article, I will tell you how to quickly and quickly configure the client mail program The Bat!with postal service Yandex.. Here are considered the most basic elements of settings that do not require any knowledge and skills of working with email. It is assumed to have a previously registered account in the postal service Yandex. and already installed postal client The Bat.
This information is designed primarily for newcomers, therefore, it replete with a large number of screenshots and a detailed description of actions that may seem completely requiring comments. Please treat with understanding.
And so, it is assumed, we already have an installed postal program The Bat!. If the program launch is performed for the first time, the information informing window will be displayed. Create a new mailbox. Consequently, you can immediately go to clause 3 of this article. In all other cases, follow the instructions:
1. In the main menu of the mail program, go to category BoxAs shown in Figure 1.
Picture 1.
2. Further, in the pop-up menu, select the item New mailbox. See Figure 2.  Figure 2.
3. The informing window appears with a proposal to create a new mailbox, or restore the already existing one. We are interested in the first paragraph, circled in Figure 3 with a red marker. We celebrate it, then press the button Further. Figure 3.
4. In the window that appears, you are invited to enter the name of the mailbox. In my case, the name looks like [email protected].. I note at once, it is not an email address, but a regular name displayed. It may look: My mail, Yandex Mail et al. Complete the entry by pressing the button Further. Figure 4.
5. Now it is proposed to enter the name, email address and organization, as shown in Figure 5. In the field Name - Your real name, full name or pseudonym is introduced. In field E-mail address Enter the current email address. Organization - The name of your organization. In the future, this data will be used in the postal program templates when sending letters. If desired, this data can be changed in the mailbox settings. To apply input, press the button Further. Figure 5.
6. We see the window to select the protocol and entering the addresses of the receiving and sending email. Check the protocol selected POP3 - POST OFFICE PROTOCOL V3 As shown in Figure 6. The server for mailing - pop.yandex.ru., server to send mail - smtp.yandex.ru.. Also, check availability for the appropriate checkbox My SMTP server requires authentication. After that, click Further.
Comment! If your postal address has prefix @ Narod.ru., the receiving and sending mail will look like pop.narod.ru. and sMTP.NAROD.RU. respectively!  Figure 6.
7. In the next window, you must enter the identification data that was specified when registering an email. The red marker in Figure 7 marked the fields for entering the username and password. Note, the username is entered without a server name, i.e. if your email box has a view [email protected].then the user's name entered will look like ivanov.ivan.
Here you can choose the function of deleting letters from the server when receiving. For this, we remove the checkbox from the point to leave letters on the server marked with blue. After that, press the Next button.  Figure 7.
8. In the last setting point to the question of checking the other properties of the mailbox, set the checkbox NotAs noted in Figure 8. And, to complete the setting, press the button Ready. Figure 8.

Surely each of us knows domestic. But only far from everyone knows that they can be managed not only through the official site.
There are also a number of mail programs that serve for a convenient disposal of their mailboxes on different domains. Today we will analyze the Mail.ru settings for the most popular for almost two decades.
There are two types of The Bat settings for Mail.Ru: via the IMAP protocol and POP3 protocol. We will analyze both, and start with imap.
Go to The Bat!. In the "Box" menu, choose a "new mailbox".

Box name is completely your fantasy. Click "Next".
There is already a more specific page where you need to enter "your full name", which will be displayed in the "From:" field in the sent messages, as well as the "E-mail address" where you enter your address for which we configure the program, and If necessary, fill in the "Organization" field. Click "Next".

Now - the page is even more stuffing with the settings! Here we enter everything exactly as in the instructions:
- to access the server to use the iMap protocol;
- Server for mailing - imap.mail.ru;

In the "User" field of the next window, enter your mailbox, which includes login, sign "@" and domain Mail.ru. In the "Password" field - a password from the box.

After clicking the "Next" button, you answer the question "do you want to check the other properties of the mailbox?" Positive and press "ready." In the new menu, select the "Transport" item, and in the "Connection" items for sending and selecting "safe to special (TLS)". It is necessary to ensure maximum security by encryption. It is also necessary to verify that the SMTP port ("sending mail") is 465, and the IMAP4 port ("receiving mail") is 993.

From this menu, we do not leave anywhere, and press "authentication ..." opposite the "SMTP server" field. We put a tick opposite the field "SMTP authentication (RFC-2554)" and select the item "Use mail receipt parameters (POP3 / IMAP)". Click "OK".

On the newly created account, you need to right-click and click "Update Folder Tree" so that the folder list is similar to the folder list in the box.

Return to this context menu again. Now you need to configure the place where you will be saved using the letter and other letters from the system folders. Click "Mailbox properties ...".

We are looking for the right "Mail Management" and set the daws opposite the "sent" and "basket". In the field on the right, select the items identical by name.

The "Mail Management" section has a "Delete" subsection. We go into it and put the ticks opposite "Move to the specified folder", select the "Basket" folder using the "Overview" button. Tick \u200b\u200bwith "Use an alternative removal for old letters" we remove, to "mark remote letters as read" - put.

On this setting over the IMAP protocol is completed. Now consider setting POP3.
Similarly, the "drawer" is "new mailbox ...".
Any box name is chosen in the box "Box" and click "Next".
Identically previous settings, set in "Your Full Name" The name of the sender, and in the "E-mail address" - the address of the custom mailbox. Click "Next".

A menu opens where you need to select the following items:
- For access to the server, use the protocol - POP3;
- Server for mailing - pop.mail.ru;
- SMTP server address - smtp.mail.ru.

Immediately put in the next window "Leave letters on the server", in the "User" and "Password" fields - your login and password from the post office. Login, I remind you, should consist of the name, the "doggy" icon and the Mail.ru domain.

Encryption will be included here. Reply to "Do you want to check the other properties of the mailbox?" In the next window, by pressing "Yes" and click "Finish" to go to the properties.
In the "Transport" section in "Connections" Points "Secure on Spec.port (TLS)", check the ports: POP3-server - 995, SMTP server - 465. Opposite the "SMTP server" click "Authentication ..." , We put a tick opposite "SMTP ..." authentication, mark the item "Use mail receipt parameters (POP3 / IMAP)". Everywhere I click "OK" - Mail via the POP3 protocol is configured.

As you can see, nothing is complicated. Use the Bat postal program! with pleasure. See you!
Setting the Bat!
1. After starting the program, select Box → New Mailbox
2. In the window Drawer name Enter your mailbox name

3.1. In the window Your full name Enter your name and surname
3.2. In the window E-mail address Enter your e-mail

4.1. In the window To access the server to use the protocol Choose POP3 - POST OFFICE PROTOCOL V3
4.2. In the window Server for mailing Enter mail.effect.kiev.ua.
4.3. In the window SMTP Server Address Enter sMTP.EFFECT.KIEV.UA.
4.4. Put a tick on the contrary My SMTP server requires authentication
4.5. Make sure opposite Secure Connection. No checkboxes

5.1. In the window User Enter your login
5.2. In the window Password Enter your password

6. In the window Want to check the remaining properties of the mailbox? Choose Yesand press Ready

7.1. Select the tab Transport
7.2. In the window Port In the field of sending mail, enter 2525
7.4. In the window Port In the field of receiving mail, enter 110
7.6. Click on the button Authentication ...

8.1. Put a tick on the contrary SMTP Authentication (RFC-2554)
8.2. Choose Use mail receipt options (POP3 / IMAP)
8.3. Click OK For closing the window Authentication when sending mail (SMTP)
8.4. Click OK For closing the window Mailbox Properties - (Name Your Mailbox)


Instructions for using JSQL Injection - Multifunction tool for searching and operating SQL injections in Kali Linux gr
ShoppingGid: How to remove annoying spam?
How to send a message to all friends VKontakte
How to buy hacker skills
Best Tools for Craw Marketing